当前主流 TTS 系统的推理瓶颈,本质上是一个序列长度问题。无论是基于 Flow Matching 还是标准 Diffusion 的方案,生成高质量音频的计算复杂度都与时序序列长度强相关——而大多数系统的音频 token 密度仍然偏高,导致推理成本居高不下。
VoxFlash-TTS 从根源上重新思考了这个问题:如果把序列压缩到极限,会怎样?
核心架构:极致时序压缩的潜空间
VAE:9 Hz 的极端压缩比
VoxFlash 的 VAE 将 24kHz 原始波形编码到仅 9 帧/秒(9 Hz) 的潜空间表示。
对比一下:Stable Audio 的连续潜空间约为 21.5 fps,EnCodec 的离散 token 约为 75 fps,而多数语音 LM 方案的 semantic token 也在 50 fps 左右。9 Hz 是一个激进的选择——它意味着生成 10 秒音频,扩散模型只需处理 90 个潜向量,而非数百甚至上千个 token。
根据 Transformer 的自注意力复杂度 $O(n^2)$ 和 Diffusion U-Net 的卷积复杂度,序列长度的压缩对计算量的削减是超线性的。VoxFlash 官方描述为”计算量降低数个数量级”,这个说法在序列层面是成立的。
尽管压缩比如此之高,VAE Decoder 仍能还原出高保真音频——这依赖于精心设计的重建损失和对感知质量的优化,是整个系统最关键的工程挑战之一。
TTS 模块:对齐算法的创新
文本到语音的核心难题是时序对齐:如何把变长的音素序列映射到变长的音频序列。
传统方案依赖 Cross-Attention 隐式对齐(如 NaturalSpeech2、Voicebox),计算开销与序列乘积成正比。VoxFlash 采用了一种粗粒度显式对齐算法,在牺牲少量灵活性的前提下,将对齐步骤的复杂度显著压缩。
音素编码器基于 ConvNeXtV2,相比 Transformer Encoder 有更低的参数量和更友好的硬件利用率,适合在资源受限场景下运行。
生成阶段使用标准的多步扩散(默认 NFE=16),在潜空间上完成迭代去噪,最后经 VAE Decoder 还原为波形。整条链路的参数规模和计算量都显著低于同类系统。
零样本语音克隆
VoxFlash 支持同语言和跨语言零样本克隆,无需针对目标说话人做任何微调。
说话人信息通过参考音频提取为 speaker embedding,注入扩散生成过程,引导输出音色向目标靠拢。跨语言场景(如用中文参考音频生成英文语音)表明模型实现了音色特征与语言特征的有效解耦,这在低参数量的轻量模型中并不多见。
Demo 页面的样本直接引自 Seed-TTS 的评测集,方便与业界其他系统做横向对比。
工程落地:从论文到可部署系统
部署门槛
1 | # 环境要求:CUDA >= 12.3.2 |
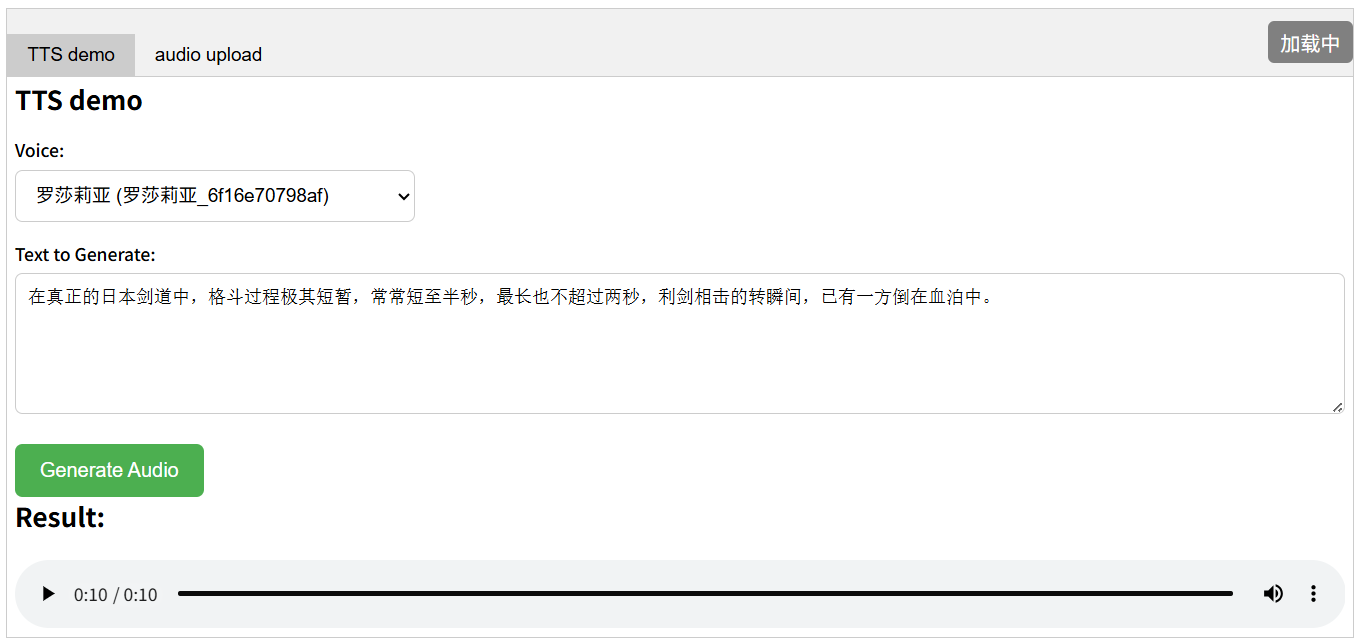
启动后访问 http://127.0.0.1:8000/demo.html,WebUI 即可使用。
低端显卡可运行是一个明确的设计目标,而非附带属性。9 Hz 潜空间直接决定了显存占用和计算峰值都处于较低水平,这对边缘推理和个人开发者场景友好度极高。
适用场景分析
| 场景 | 关键指标 | VoxFlash 优势 |
|---|---|---|
| 实时语音交互 | 首包延迟 < 200ms | 潜序列短,扩散步数少 |
| 大规模批量合成 | 吞吐量、GPU 成本 | 计算量数量级差距 |
| 边缘/端侧部署 | 显存、功耗 | 轻量架构,低端卡可跑 |
| 个人开发者 | 部署复杂度 | Docker 一键,无需调优 |
与现有方案的定位差异
当前语音克隆领域的主流系统大致分为两类:
- 质量优先型(如 Seed-TTS、CosyVoice 2):追求高相似度和自然度,推理成本较高,通常依赖云端 GPU 集群
- 速度优先型(如部分 FastSpeech 变体):推理快,但克隆效果和语言泛化能力有限
VoxFlash 的切入点是:在保持可接受音质的前提下,将推理速度推向工程可落地的极限,并且通过端侧友好的架构设计,让这种速度在消费级硬件上也能实现。
这不是在做最好听的 TTS,而是在做最快、最轻、最容易部署的克隆系统。
小结
VoxFlash-TTS 的核心贡献可以归纳为:
- 9 Hz 极端时序压缩:序列长度的激进压缩使全链路计算量大幅下降
- 轻量扩散生成:ConvNeXtV2 编码器 + 粗粒度对齐 + 潜空间扩散,构成低成本生成路径
- 零样本双语克隆:音色与语言解耦,中英文场景开箱即用
- 工程优先设计:Docker 化部署,低端 GPU 可运行,面向真实落地场景
对于需要在资源受限环境下集成语音克隆能力的工程团队,或者希望在本地快速跑通 TTS pipeline 的研究者,VoxFlash-TTS 值得作为基线系统认真评估。
项目地址
- Demo:voxflash.github.io
- GitHub:github.com/VoxFlash/VoxFlashTTS