本文利用spring cloud集成消息服务,建立消息生产者与消息消费者,与消息服务器通信

首先需要搭建rabbit消息服务器,这里作为测试,利用在线服务https://www.cloudamqp.com

然后建立消息生产者微服务cloud-stream-producer-rabbitmq

消息生产者微服务需要引入依赖spring-cloud-stream、spring-cloud-stream-binder-rabbit,其pom.xml文件如下;

1
2
3
4
5
6
7
8
9
10
11
12
13
14
15
16
17
18
19
20
21
22
23
24
25
26
27
28
29
30
31
32
33
34
35
36
37
38
39
40
41
42
43
44
45
46
47
48
49
50
51
52
53
54
55
56
57
58
59
60
61
62
63
64
65
66
67
68
69
70
71
72
73
74
75
76
77
78
<?xml version="1.0" encoding="UTF-8"?>
<project xmlns="http://maven.apache.org/POM/4.0.0" xmlns:xsi="http://www.w3.org/2001/XMLSchema-instance"
xsi:schemaLocation="http://maven.apache.org/POM/4.0.0 https://maven.apache.org/xsd/maven-4.0.0.xsd">
<modelVersion>4.0.0</modelVersion>
<parent>
<groupId>org.springframework.boot</groupId>
<artifactId>spring-boot-starter-parent</artifactId>
<version>2.1.8.RELEASE</version>
<relativePath/> <!-- lookup parent from repository -->
</parent>
<groupId>com.ralab</groupId>
<artifactId>cloud-stream-producer-rabbitmq</artifactId>
<version>0.0.1-SNAPSHOT</version>
<name>cloud-stream-producer-rabbitmq</name>
<description>Demo project for Spring Boot</description>

<properties>
<java.version>1.8</java.version>
<spring-cloud.version>Greenwich.SR3</spring-cloud.version>
</properties>

<dependencies>
<dependency>
<groupId>org.springframework.boot</groupId>
<artifactId>spring-boot-starter-amqp</artifactId>
</dependency>
<dependency>
<groupId>org.springframework.boot</groupId>
<artifactId>spring-boot-starter-web</artifactId>
</dependency>
<dependency>
<groupId>org.springframework.cloud</groupId>
<artifactId>spring-cloud-stream</artifactId>
</dependency>
<dependency>
<groupId>org.springframework.cloud</groupId>
<artifactId>spring-cloud-stream-binder-rabbit</artifactId>
</dependency>

<dependency>
<groupId>org.springframework.boot</groupId>
<artifactId>spring-boot-starter-test</artifactId>
<scope>test</scope>
</dependency>
<dependency>
<groupId>org.springframework.amqp</groupId>
<artifactId>spring-rabbit-test</artifactId>
<scope>test</scope>
</dependency>
<dependency>
<groupId>org.springframework.cloud</groupId>
<artifactId>spring-cloud-stream-test-support</artifactId>
<scope>test</scope>
</dependency>
</dependencies>

<dependencyManagement>
<dependencies>
<dependency>
<groupId>org.springframework.cloud</groupId>
<artifactId>spring-cloud-dependencies</artifactId>
<version>${spring-cloud.version}</version>
<type>pom</type>
<scope>import</scope>
</dependency>
</dependencies>
</dependencyManagement>

<build>
<plugins>
<plugin>
<groupId>org.springframework.boot</groupId>
<artifactId>spring-boot-maven-plugin</artifactId>
</plugin>
</plugins>
</build>

</project>

User消息类

1
2
3
4
5
6
7
8
9
10
11
12
13
14
15
16
17
18
19
20
21
22
23
24
25
26
27
28
29
30
31
32
33
34
35
36
37
38
39
40
41
package com.ralab.cloudstreamproducerrabbitmq;

import com.fasterxml.jackson.annotation.JsonIgnoreProperties;

@JsonIgnoreProperties(ignoreUnknown = true)
public class User {
private String userName;
private String addr;
private int age;

public User(){}
public User(String userName, String addr, int age) {
this.userName = userName;
this.addr = addr;
this.age = age;
}

public String getUserName() {
return userName;
}

public void setUserName(String userName) {
this.userName = userName;
}

public String getAddr() {
return addr;
}

public void setAddr(String addr) {
this.addr = addr;
}

public int getAge() {
return age;
}

public void setAge(int age) {
this.age = age;
}
}

ProducerController3消息生产类

1
2
3
4
5
6
7
8
9
10
11
12
13
14
15
16
17
18
19
20
21
22
23
24
25
26
27
28
29
package com.ralab.cloudstreamproducerrabbitmq;

import org.springframework.beans.factory.annotation.Autowired;
import org.springframework.beans.factory.annotation.Qualifier;
import org.springframework.cloud.stream.annotation.EnableBinding;
import org.springframework.cloud.stream.messaging.Source;
import org.springframework.messaging.Message;
import org.springframework.messaging.MessageChannel;
import org.springframework.messaging.support.MessageBuilder;
import org.springframework.web.bind.annotation.PostMapping;
import org.springframework.web.bind.annotation.RequestBody;
import org.springframework.web.bind.annotation.RestController;

@RestController
@EnableBinding(Source.class)
public class ProducerController3 {

@Autowired
@Qualifier(Source.OUTPUT)
private MessageChannel userChannel;

@PostMapping("/produce")
public void publish3(@RequestBody User user) {

Message<User> msg = MessageBuilder.withPayload(user).build();
this.userChannel.send(msg);
//this.binding.greeting().send(msg);
}
}

application.properties配置

1
2
3
4
spring.rabbitmq.addresses=amqp://byqzaxwz:Tlrt32CSQYMHEeitFVUB43wkCSsiUlwo@hornet.rmq.cloudamqp.com/byqzaxwz
spring.cloud.stream.bindings.output.destination = user

server.port=8080

运行该应用CloudStreamProducerRabbitmqApplication

同时建立消息消费者微服务cloud-stream-consumer-rabbitmq,其pom.xml文件如下:

1
2
3
4
5
6
7
8
9
10
11
12
13
14
15
16
17
18
19
20
21
22
23
24
25
26
27
28
29
30
31
32
33
34
35
36
37
38
39
40
41
42
43
44
45
46
47
48
49
50
51
52
53
54
55
56
57
58
59
60
61
62
63
64
65
66
67
68
69
70
71
72
73
74
75
76
77
78
<?xml version="1.0" encoding="UTF-8"?>
<project xmlns="http://maven.apache.org/POM/4.0.0" xmlns:xsi="http://www.w3.org/2001/XMLSchema-instance"
xsi:schemaLocation="http://maven.apache.org/POM/4.0.0 https://maven.apache.org/xsd/maven-4.0.0.xsd">
<modelVersion>4.0.0</modelVersion>
<parent>
<groupId>org.springframework.boot</groupId>
<artifactId>spring-boot-starter-parent</artifactId>
<version>2.1.8.RELEASE</version>
<relativePath/> <!-- lookup parent from repository -->
</parent>
<groupId>com.ralab</groupId>
<artifactId>cloud-stream-consumer-rabbitmq</artifactId>
<version>0.0.1-SNAPSHOT</version>
<name>cloud-stream-consumer-rabbitmq</name>
<description>Demo project for Spring Boot</description>

<properties>
<java.version>1.8</java.version>
<spring-cloud.version>Greenwich.SR3</spring-cloud.version>
</properties>

<dependencies>
<dependency>
<groupId>org.springframework.boot</groupId>
<artifactId>spring-boot-starter-amqp</artifactId>
</dependency>
<dependency>
<groupId>org.springframework.boot</groupId>
<artifactId>spring-boot-starter-web</artifactId>
</dependency>
<dependency>
<groupId>org.springframework.cloud</groupId>
<artifactId>spring-cloud-stream</artifactId>
</dependency>
<dependency>
<groupId>org.springframework.cloud</groupId>
<artifactId>spring-cloud-stream-binder-rabbit</artifactId>
</dependency>

<dependency>
<groupId>org.springframework.boot</groupId>
<artifactId>spring-boot-starter-test</artifactId>
<scope>test</scope>
</dependency>
<dependency>
<groupId>org.springframework.amqp</groupId>
<artifactId>spring-rabbit-test</artifactId>
<scope>test</scope>
</dependency>
<dependency>
<groupId>org.springframework.cloud</groupId>
<artifactId>spring-cloud-stream-test-support</artifactId>
<scope>test</scope>
</dependency>
</dependencies>

<dependencyManagement>
<dependencies>
<dependency>
<groupId>org.springframework.cloud</groupId>
<artifactId>spring-cloud-dependencies</artifactId>
<version>${spring-cloud.version}</version>
<type>pom</type>
<scope>import</scope>
</dependency>
</dependencies>
</dependencyManagement>

<build>
<plugins>
<plugin>
<groupId>org.springframework.boot</groupId>
<artifactId>spring-boot-maven-plugin</artifactId>
</plugin>
</plugins>
</build>

</project>

同样需要添加User消息类,与消息生产者微服务相同
添加消息消费类UserListener

1
2
3
4
5
6
7
8
9
10
11
12
13
14
15
package com.ralab.cloudstreamconsumerrabbitmq;

import org.springframework.cloud.stream.annotation.EnableBinding;
import org.springframework.cloud.stream.annotation.StreamListener;
import org.springframework.cloud.stream.messaging.Sink;


@EnableBinding(Sink.class)
public class UserListener {

@StreamListener(target = Sink.INPUT)
public void processUserChannelGreeting(User user) {
System.out.println(user.getUserName()+":"+user.getAddr()+":"+user.getAge());
}
}

application.properties配置

1
2
3
spring.rabbitmq.addresses=amqp://byqzaxwz:Tlrt32CSQYMHEeitFVUB43wkCSsiUlwo@hornet.rmq.cloudamqp.com/byqzaxwz
spring.cloud.stream.bindings.input.destination = user
server.port=9090

运行CloudStreamConsumerRabbitmqApplication
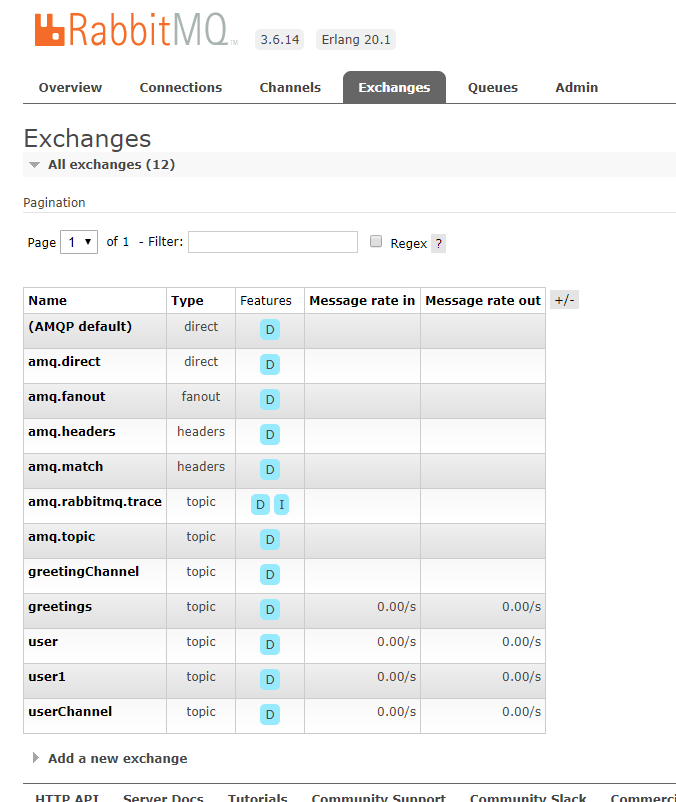
查看rabbitmq消息服务器
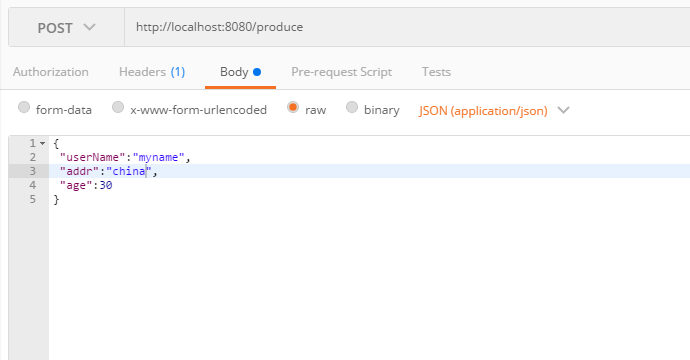
测试发送消息
然后就可以看到在消息消费者微服务的控制台输出消息

上文中的被监控端微服务,我们引入了spring-boot-admin-starter-client依赖,这样一来,貌似对我们的微服务有某种侵入性;在实际应用中,我们的微服务都是注册到eureka server服务器,因此监控服务端spring-boot-admin可以从注册服务器获取我们的微服务列表,而不用每一个监控端微服务都引入监控服务端的url信息,也不用引入spring-boot-admin-starter-client依赖(当然需要引入spring-boot-starter-actuator依赖)

改造微服务ralab-admin

  • Add the Maven spring-cloud-starter-netflix-eureka-client denpendencys
  • Add @EnableEurekaClient to the application class
  • Config eureka server info to application.yml file
    其pom.xml文件如下:
    1
    2
    3
    4
    5
    6
    7
    8
    9
    10
    11
    12
    13
    14
    15
    16
    17
    18
    19
    20
    21
    22
    23
    24
    25
    26
    27
    28
    29
    30
    31
    32
    33
    34
    35
    36
    37
    38
    39
    40
    41
    42
    43
    44
    45
    46
    47
    48
    49
    50
    51
    52
    53
    54
    55
    56
    57
    58
    59
    60
    61
    62
    63
    64
    65
    66
    67
    68
    69
    <?xml version="1.0" encoding="UTF-8"?>
    <project xmlns="http://maven.apache.org/POM/4.0.0" xmlns:xsi="http://www.w3.org/2001/XMLSchema-instance"
    xsi:schemaLocation="http://maven.apache.org/POM/4.0.0 https://maven.apache.org/xsd/maven-4.0.0.xsd">
    <modelVersion>4.0.0</modelVersion>
    <parent>
    <groupId>org.springframework.boot</groupId>
    <artifactId>spring-boot-starter-parent</artifactId>
    <version>2.1.8.RELEASE</version>
    <relativePath/> <!-- lookup parent from repository -->
    </parent>
    <groupId>com.ralab</groupId>
    <artifactId>ralab-admin</artifactId>
    <version>0.0.1-SNAPSHOT</version>
    <name>ralab-admin</name>
    <description>Demo project for Spring Boot</description>

    <properties>
    <java.version>1.8</java.version>
    <spring-boot-admin.version>2.1.5</spring-boot-admin.version>
    <spring-cloud.version>Greenwich.SR3</spring-cloud.version>
    </properties>

    <dependencies>
    <dependency>
    <groupId>de.codecentric</groupId>
    <artifactId>spring-boot-admin-starter-server</artifactId>
    </dependency>

    <dependency>
    <groupId>org.springframework.cloud</groupId>
    <artifactId>spring-cloud-starter-netflix-eureka-client</artifactId>
    </dependency>

    <dependency>
    <groupId>org.springframework.boot</groupId>
    <artifactId>spring-boot-starter-test</artifactId>
    <scope>test</scope>
    </dependency>
    </dependencies>

    <dependencyManagement>
    <dependencies>
    <dependency>
    <groupId>org.springframework.cloud</groupId>
    <artifactId>spring-cloud-dependencies</artifactId>
    <version>${spring-cloud.version}</version>
    <type>pom</type>
    <scope>import</scope>
    </dependency>
    <dependency>
    <groupId>de.codecentric</groupId>
    <artifactId>spring-boot-admin-dependencies</artifactId>
    <version>${spring-boot-admin.version}</version>
    <type>pom</type>
    <scope>import</scope>
    </dependency>
    </dependencies>
    </dependencyManagement>

    <build>
    <plugins>
    <plugin>
    <groupId>org.springframework.boot</groupId>
    <artifactId>spring-boot-maven-plugin</artifactId>
    </plugin>
    </plugins>
    </build>

    </project>

RalabAdminApplication文件

1
2
3
4
5
6
7
8
9
10
11
12
13
14
15
16
17
package com.ralab.ralabadmin;

import de.codecentric.boot.admin.server.config.EnableAdminServer;
import org.springframework.boot.SpringApplication;
import org.springframework.boot.autoconfigure.SpringBootApplication;
import org.springframework.cloud.netflix.eureka.EnableEurekaClient;

@SpringBootApplication
@EnableAdminServer
@EnableEurekaClient
public class RalabAdminApplication {

public static void main(String[] args) {
SpringApplication.run(RalabAdminApplication.class, args);
}

}

application.yml文件

1
2
3
4
5
6
7
8
9
10
11
12
13
14
server:
port: 8080
spring:
application:
name: service-admin

eureka:
instance:
# ip-address: 127.0.0.1
prefer-ip-address: true # 补充
instance-id: ${spring.application.name}:${spring.cloud.client.ip-address}:${server.port}
client:
serviceUrl:
defaultZone: http://localhost:8761/eureka/

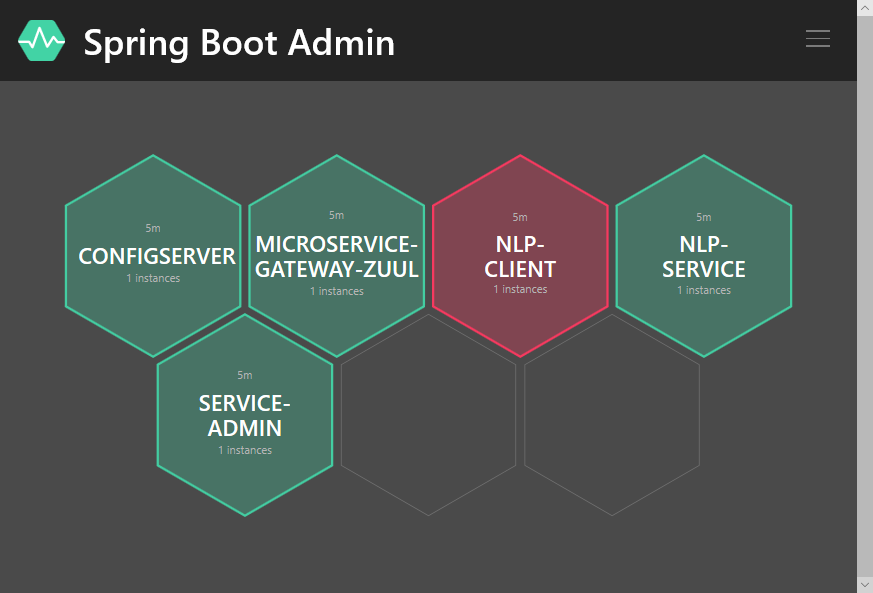
然后运行eureka server服务器,运行被监控微服务,运行上面的监控微服务,打开http://127.0.0.1:8080

记得被监控的微服务加入依赖

1
2
3
4
<dependency>
<groupId>org.springframework.boot</groupId>
<artifactId>spring-boot-starter-actuator</artifactId>
</dependency>

添加配置

1
2
3
4
5
6
7
8
management:
endpoints:
web:
exposure:
include: '*'
endpoint:
health:
show-details: always

在前面的文章中,我们涉及到了Spring Boot Actuator组件,该组件用来监控系统运行状态,不过,貌似该组件显示的信息是以文本的形式展示的,对于我们查看不太方便,为此spring cloud提供了一个更强大的监控组件Spring Boot Admin,以可视化的形式显示监控状态
微服务ralab-admin

  • New microservice ‘ralab-admin’ and and add the Maven spring-boot-admin-starter-server denpendencys
  • Add @EnableAdminServer to the application class
  • Config Spring Boot Admin info to application.yml file
    其pom.xml文件如下:
    1
    2
    3
    4
    5
    6
    7
    8
    9
    10
    11
    12
    13
    14
    15
    16
    17
    18
    19
    20
    21
    22
    23
    24
    25
    26
    27
    28
    29
    30
    31
    32
    33
    34
    35
    36
    37
    38
    39
    40
    41
    42
    43
    44
    45
    46
    47
    48
    49
    50
    51
    52
    53
    54
    55
    56
    <?xml version="1.0" encoding="UTF-8"?>
    <project xmlns="http://maven.apache.org/POM/4.0.0" xmlns:xsi="http://www.w3.org/2001/XMLSchema-instance"
    xsi:schemaLocation="http://maven.apache.org/POM/4.0.0 https://maven.apache.org/xsd/maven-4.0.0.xsd">
    <modelVersion>4.0.0</modelVersion>
    <parent>
    <groupId>org.springframework.boot</groupId>
    <artifactId>spring-boot-starter-parent</artifactId>
    <version>2.1.8.RELEASE</version>
    <relativePath/> <!-- lookup parent from repository -->
    </parent>
    <groupId>com.ralab</groupId>
    <artifactId>ralab-admin</artifactId>
    <version>0.0.1-SNAPSHOT</version>
    <name>ralab-admin</name>
    <description>Demo project for Spring Boot</description>

    <properties>
    <java.version>1.8</java.version>
    <spring-boot-admin.version>2.1.5</spring-boot-admin.version>
    </properties>

    <dependencies>
    <dependency>
    <groupId>de.codecentric</groupId>
    <artifactId>spring-boot-admin-starter-server</artifactId>
    </dependency>

    <dependency>
    <groupId>org.springframework.boot</groupId>
    <artifactId>spring-boot-starter-test</artifactId>
    <scope>test</scope>
    </dependency>
    </dependencies>

    <dependencyManagement>
    <dependencies>
    <dependency>
    <groupId>de.codecentric</groupId>
    <artifactId>spring-boot-admin-dependencies</artifactId>
    <version>${spring-boot-admin.version}</version>
    <type>pom</type>
    <scope>import</scope>
    </dependency>
    </dependencies>
    </dependencyManagement>

    <build>
    <plugins>
    <plugin>
    <groupId>org.springframework.boot</groupId>
    <artifactId>spring-boot-maven-plugin</artifactId>
    </plugin>
    </plugins>
    </build>

    </project>

RalabAdminApplication文件

1
2
3
4
5
6
7
8
9
10
11
12
13
14
15
package com.ralab.ralabadmin;

import de.codecentric.boot.admin.server.config.EnableAdminServer;
import org.springframework.boot.SpringApplication;
import org.springframework.boot.autoconfigure.SpringBootApplication;

@SpringBootApplication
@EnableAdminServer
public class RalabAdminApplication {

public static void main(String[] args) {
SpringApplication.run(RalabAdminApplication.class, args);
}

}

application.yml

1
2
3
4
5
server:
port: 8080
spring:
application:
name: service-admin

运行RalabAdminApplication,打开http://127.0.0.1:8080
然后我们新建被监控端微服务,引入spring-boot-admin-client依赖,其pom.xml文件如下:

1
2
3
4
5
6
7
8
9
10
11
12
13
14
15
16
17
18
19
20
21
22
23
24
25
26
27
28
29
30
31
32
33
34
35
36
37
38
39
40
41
42
43
44
45
46
47
48
49
50
51
52
53
54
55
56
57
58
59
60
61
62
63
64
65
<?xml version="1.0" encoding="UTF-8"?>
<project xmlns="http://maven.apache.org/POM/4.0.0" xmlns:xsi="http://www.w3.org/2001/XMLSchema-instance"
xsi:schemaLocation="http://maven.apache.org/POM/4.0.0 https://maven.apache.org/xsd/maven-4.0.0.xsd">
<modelVersion>4.0.0</modelVersion>
<parent>
<groupId>org.springframework.boot</groupId>
<artifactId>spring-boot-starter-parent</artifactId>
<version>2.1.8.RELEASE</version>
<relativePath/> <!-- lookup parent from repository -->
</parent>
<groupId>com.example</groupId>
<artifactId>demo2</artifactId>
<version>0.0.1-SNAPSHOT</version>
<name>demo2</name>
<description>Demo project for Spring Boot</description>

<properties>
<java.version>1.8</java.version>
<spring-boot-admin.version>2.1.5</spring-boot-admin.version>
</properties>

<dependencies>
<dependency>
<groupId>org.springframework.boot</groupId>
<artifactId>spring-boot-starter-actuator</artifactId>
</dependency>
<dependency>
<groupId>org.springframework.boot</groupId>
<artifactId>spring-boot-starter-web</artifactId>
</dependency>
<dependency>
<groupId>de.codecentric</groupId>
<artifactId>spring-boot-admin-starter-client</artifactId>
</dependency>


<dependency>
<groupId>org.springframework.boot</groupId>
<artifactId>spring-boot-starter-test</artifactId>
<scope>test</scope>
</dependency>
</dependencies>

<dependencyManagement>
<dependencies>
<dependency>
<groupId>de.codecentric</groupId>
<artifactId>spring-boot-admin-dependencies</artifactId>
<version>${spring-boot-admin.version}</version>
<type>pom</type>
<scope>import</scope>
</dependency>
</dependencies>
</dependencyManagement>

<build>
<plugins>
<plugin>
<groupId>org.springframework.boot</groupId>
<artifactId>spring-boot-maven-plugin</artifactId>
</plugin>
</plugins>
</build>

</project>

application.yml配置

1
2
3
4
5
6
7
8
9
10
11
12
13
14
15
16
17
18
19
20
server:
port: 8091
spring:
application:
name: web_a
boot:
admin:
client:
instance:
prefer-ip: true
url: http://127.0.0.1:8080 #配置需要接入的admin-server地址

management:
endpoints:
web:
exposure:
include: "*"
endpoint:
health:
show-details: always

运行Demo2Application,这时我们可以看到监控状态信息http://127.0.0.1:8080

上文中利用zuul组件实现了微服务的路由功能,本文继续探讨其过滤器、熔断器功能
zuul过滤器分不同类型,具体有error、post、pre、route过滤器,貌似zuul组件内置实现了一些默认的过滤器

本文参考网上的文章,实现pre过滤器
MyPreFilter实现ZuulFilter接口

1
2
3
4
5
6
7
8
9
10
11
12
13
14
15
16
17
18
19
20
21
22
23
24
25
26
27
28
29
30
31
32
33
34
35
36
37
38
39
40
41
42
43
44
45
46
47
48
49
50
51
52
53
54
55
56
57
58
package com.ralab.ralabzuul.filter;

import com.netflix.zuul.ZuulFilter;
import com.netflix.zuul.context.RequestContext;
import com.netflix.zuul.exception.ZuulException;
import org.apache.commons.lang.StringUtils;
import org.slf4j.Logger;
import org.slf4j.LoggerFactory;
import org.springframework.cloud.netflix.zuul.filters.support.FilterConstants;
import org.springframework.stereotype.Component;
import javax.servlet.http.HttpServletRequest;
import javax.servlet.http.HttpServletResponse;

@Component
public class MyPreFilter extends ZuulFilter {

private static final Logger logger= LoggerFactory.getLogger(MyPreFilter.class);
@Override
public String filterType() {
return FilterConstants.PRE_TYPE;
}

@Override
public int filterOrder() {
return 0;
}

@Override
public boolean shouldFilter() {
return true;
}

@Override
public Object run() throws ZuulException {

RequestContext requestContext = RequestContext.getCurrentContext();
HttpServletRequest request = requestContext.getRequest();

//获取请求参数
String token = request.getParameter("token");

//校验token是否可以通过
if (StringUtils.isNotBlank(token) && token.equals("maomao")) {
requestContext.setSendZuulResponse(true);
requestContext.setResponseStatusCode(200);
requestContext.set("code", 1);
} else {
requestContext.setSendZuulResponse(false);
requestContext.setResponseStatusCode(401);
HttpServletResponse response = requestContext.getResponse();
response.setHeader("content-type", "text/html;charset=utf-8");
requestContext.setResponseBody("网关认证失败,停止路由");
requestContext.set("code", 0);
}

return null;
}
}

测试http://127.0.0.1:8040/api/nlpservice/nlp/api

接下来实现fallback机制,MyFallbackProvider实现FallbackProvider接口

1
2
3
4
5
6
7
8
9
10
11
12
13
14
15
16
17
18
19
20
21
22
23
24
25
26
27
28
29
30
31
32
33
34
35
36
37
38
39
40
41
42
43
44
45
46
47
48
49
50
51
52
53
54
55
56
57
58
59
60
61
62
63
64
65
66
67
68
69
70
71
package com.ralab.ralabzuul.filter;

import org.slf4j.Logger;
import org.slf4j.LoggerFactory;
import org.springframework.cloud.netflix.zuul.filters.route.FallbackProvider;
import org.springframework.http.HttpHeaders;
import org.springframework.http.HttpStatus;
import org.springframework.http.MediaType;
import org.springframework.http.client.ClientHttpResponse;
import org.springframework.stereotype.Component;

import java.io.ByteArrayInputStream;
import java.io.IOException;
import java.io.InputStream;

@Component
public class MyFallbackProvider implements FallbackProvider {


private final Logger logger = LoggerFactory.getLogger(FallbackProvider.class);

@Override
public String getRoute() {
return "*";
}

@Override
public ClientHttpResponse fallbackResponse(String route, Throwable cause) {
if (cause != null && cause.getCause() != null) {
String reason = cause.getCause().getMessage();
logger.info("Excption {}",reason);
}
return fallbackResponse();
}

public ClientHttpResponse fallbackResponse() {
return new ClientHttpResponse() {
@Override
public HttpStatus getStatusCode() throws IOException {
return HttpStatus.OK;
}

@Override
public int getRawStatusCode() throws IOException {
return 200;
}

@Override
public String getStatusText() throws IOException {
return "OK";
}

@Override
public void close() {

}

@Override
public InputStream getBody() throws IOException {
return new ByteArrayInputStream("当前服务貌似不可用 The service is unavailable.".getBytes());
}

@Override
public HttpHeaders getHeaders() {
HttpHeaders headers = new HttpHeaders();
headers.setContentType(MediaType.APPLICATION_JSON);
return headers;
}
};
}
}

停止微服务ralab-nlp,测试http://127.0.0.1:8040/api/nlpservice/nlp/api?token=maomao

本文新建网关(gateway)微服务,利用网关实现路由映射以及过滤器、熔断器等功能
微服务’ralab-zuul’

  • New microservice ‘ralab-zuul’ and add the Maven pring-cloud-starter-netflix-zuul denpendencys
  • Config eureka server info to application.yml file
  • Add @EnableZuulProxy to the application class

其pom.xml文件如下:

1
2
3
4
5
6
7
8
9
10
11
12
13
14
15
16
17
18
19
20
21
22
23
24
25
26
27
28
29
30
31
32
33
34
35
36
37
38
39
40
41
42
43
44
45
46
47
48
49
50
51
52
53
54
55
56
57
58
59
60
<?xml version="1.0" encoding="UTF-8"?>
<project xmlns="http://maven.apache.org/POM/4.0.0" xmlns:xsi="http://www.w3.org/2001/XMLSchema-instance"
xsi:schemaLocation="http://maven.apache.org/POM/4.0.0 https://maven.apache.org/xsd/maven-4.0.0.xsd">
<modelVersion>4.0.0</modelVersion>
<parent>
<groupId>org.springframework.boot</groupId>
<artifactId>spring-boot-starter-parent</artifactId>
<version>2.1.8.RELEASE</version>
<relativePath/> <!-- lookup parent from repository -->
</parent>
<groupId>com.ralab</groupId>
<artifactId>ralab-zuul</artifactId>
<version>0.0.1-SNAPSHOT</version>
<name>ralab-zuul</name>
<description>Demo project for Spring Boot</description>

<properties>
<java.version>1.8</java.version>
<spring-cloud.version>Greenwich.SR3</spring-cloud.version>
</properties>

<dependencies>
<dependency>
<groupId>org.springframework.cloud</groupId>
<artifactId>spring-cloud-starter-netflix-eureka-client</artifactId>
</dependency>

<dependency>
<groupId>org.springframework.cloud</groupId>
<artifactId>spring-cloud-starter-netflix-zuul</artifactId>
</dependency>
<dependency>
<groupId>org.springframework.boot</groupId>
<artifactId>spring-boot-starter-test</artifactId>
<scope>test</scope>
</dependency>
</dependencies>

<dependencyManagement>
<dependencies>
<dependency>
<groupId>org.springframework.cloud</groupId>
<artifactId>spring-cloud-dependencies</artifactId>
<version>${spring-cloud.version}</version>
<type>pom</type>
<scope>import</scope>
</dependency>
</dependencies>
</dependencyManagement>

<build>
<plugins>
<plugin>
<groupId>org.springframework.boot</groupId>
<artifactId>spring-boot-maven-plugin</artifactId>
</plugin>
</plugins>
</build>

</project>

配置application.yml

1
2
3
4
5
6
7
8
9
10
11
12
13
14
15
16
17
18
19
20
21
server:
port: 8040
spring:
application:
name: microservice-gateway-zuul
eureka:
instance:
# ip-address: 127.0.0.1
prefer-ip-address: true # 补充
client:
service-url:
defaultZone: http://localhost:8761/eureka/

management:
endpoints:
web:
exposure:
include: '*'
endpoint:
health:
show-details: always

RalabZuulApplication文件

1
2
3
4
5
6
7
8
9
10
11
12
13
14
15
16
package com.ralab.ralabzuul;

import org.springframework.boot.SpringApplication;
import org.springframework.boot.autoconfigure.SpringBootApplication;
import org.springframework.cloud.netflix.zuul.EnableZuulProxy;

//@EnableEurekaClient
@SpringBootApplication
@EnableZuulProxy
public class RalabZuulApplication {

public static void main(String[] args) {
SpringApplication.run(RalabZuulApplication.class, args);
}

}

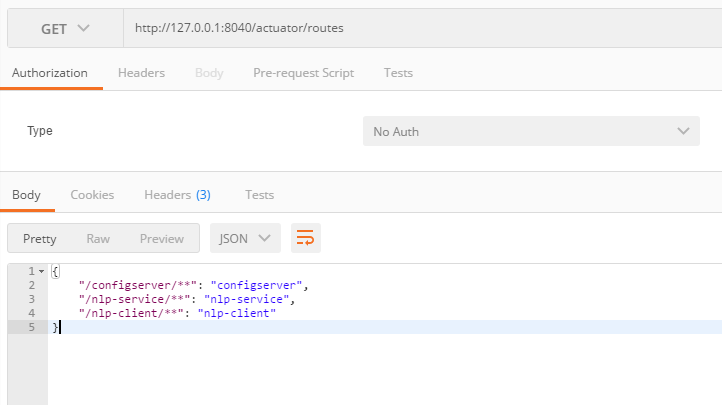
运行RalabZuulApplication,打开http://127.0.0.1:8040/actuator/routes,显示网关默认的路由

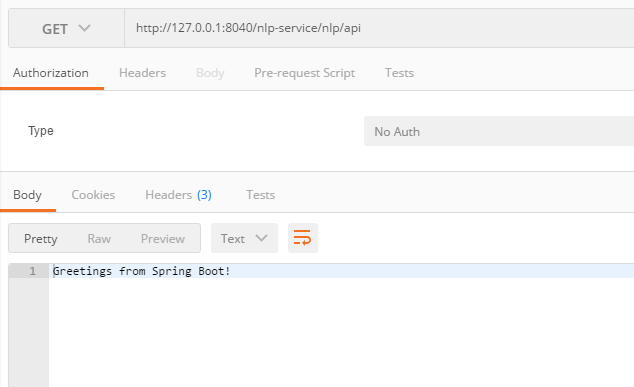
测试打开http://127.0.0.1:8040/nlp-service/nlp/api,路由成功

我们可以自定义路由规则,配置如下

1
2
3
4
5
6
7
8
9
10
11
12
13
14
15
16
17
18
19
20
21
22
23
24
25
26
27
server:
port: 8040
spring:
application:
name: microservice-gateway-zuul
eureka:
instance:
# ip-address: 127.0.0.1
prefer-ip-address: true # 补充
client:
service-url:
defaultZone: http://localhost:8761/eureka/

management:
endpoints:
web:
exposure:
include: '*'
endpoint:
health:
show-details: always

zuul:
ignored-services: '*'
prefix: /api
routes:
nlp-service: /nlpservice/**

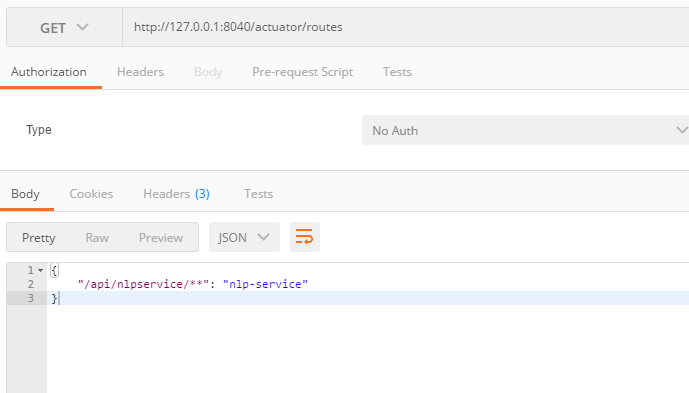
打开http://127.0.0.1:8040/actuator/routes

测试打开http://127.0.0.1:8040/nlp-service/nlp/api

配置服务器ralab-configserver同样作为微服务,可以注册到注册服务器ralab-server,然后其他微服务通过注册服务器获取到配置服务器的相关配置信息

我们先改造配置服务器ralab-configserver

  • Add the Maven spring-cloud-starter-netflix-eureka-client denpendency
  • Add ralab-server info to applcation.yml file

其pom.xml文件如下:

1
2
3
4
5
6
7
8
9
10
11
12
13
14
15
16
17
18
19
20
21
22
23
24
25
26
27
28
29
30
31
32
33
34
35
36
37
38
39
40
41
42
43
44
45
46
47
48
49
50
51
52
53
54
55
56
57
58
59
60
<?xml version="1.0" encoding="UTF-8"?>
<project xmlns="http://maven.apache.org/POM/4.0.0" xmlns:xsi="http://www.w3.org/2001/XMLSchema-instance"
xsi:schemaLocation="http://maven.apache.org/POM/4.0.0 https://maven.apache.org/xsd/maven-4.0.0.xsd">
<modelVersion>4.0.0</modelVersion>
<parent>
<groupId>org.springframework.boot</groupId>
<artifactId>spring-boot-starter-parent</artifactId>
<version>2.1.8.RELEASE</version>
<relativePath/> <!-- lookup parent from repository -->
</parent>
<groupId>com.ralab</groupId>
<artifactId>ralab-configserver</artifactId>
<version>0.0.1-SNAPSHOT</version>
<name>ralab-configserver</name>
<description>Demo project for Spring Boot</description>

<properties>
<java.version>1.8</java.version>
<spring-cloud.version>Greenwich.SR3</spring-cloud.version>
</properties>

<dependencies>
<dependency>
<groupId>org.springframework.cloud</groupId>
<artifactId>spring-cloud-config-server</artifactId>
</dependency>
<!--添加依赖,注册到eureka-server-->
<dependency>
<groupId>org.springframework.cloud</groupId>
<artifactId>spring-cloud-starter-netflix-eureka-client</artifactId>
</dependency>
<dependency>
<groupId>org.springframework.boot</groupId>
<artifactId>spring-boot-starter-test</artifactId>
<scope>test</scope>
</dependency>
</dependencies>

<dependencyManagement>
<dependencies>
<dependency>
<groupId>org.springframework.cloud</groupId>
<artifactId>spring-cloud-dependencies</artifactId>
<version>${spring-cloud.version}</version>
<type>pom</type>
<scope>import</scope>
</dependency>
</dependencies>
</dependencyManagement>

<build>
<plugins>
<plugin>
<groupId>org.springframework.boot</groupId>
<artifactId>spring-boot-maven-plugin</artifactId>
</plugin>
</plugins>
</build>

</project>

application.yml

1
2
3
4
5
6
7
8
9
10
11
12
13
14
15
server:
port: 8888
spring:
cloud:
config:
server:
encrypt.enabled: false
git:
uri: https://github.com/chenying99/config-repo
searchPaths: licensingservice,organizationservice

eureka:
client:
service-url:
defaultZone: http://localhost:8761/eureka/

重新运行RalabConfigserverApplication,浏览器打开http://localhost:8761/

然后我们改造微服务ralab-client
bootstrap.yml文件

1
2
3
4
5
6
7
8
9
10
11
12
13
14
15
16
17
18
19
20
21
22
23
24
eureka:
client:
serviceUrl:
defaultZone: http://localhost:8761/eureka/

server:
port: 8091
management:
endpoints:
web:
exposure:
include: hystrix.stream

spring:
application:
name: nlp-client
cloud:
config:
name: licensingservice # 配置应用名
profile: default
label: master
discovery:
enabled: true
service-id: configserver # 配置服务器注册名

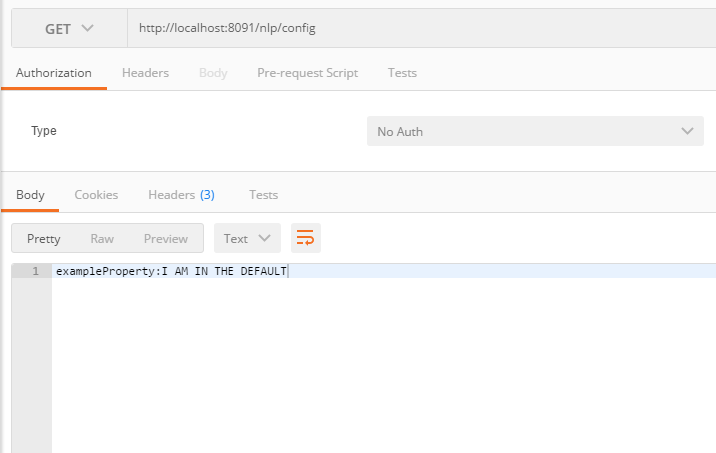
重新运行RalabClientApplication,打开http://localhost:8091/nlp/config

上文我们已经构建了配置服务器ralab-configserver,那么我们的微服务怎样从该配置服务器获取相关配置信息呢?这里我们改造原来的ralab-client微服务

ralab-client微服务

  • Add the Maven spring-cloud-starter-config denpendency
  • Test example.property value in NlpResource
  • Add configserver info to bootstrap.yml file

其pom.xml文件添加spring-cloud-starter-config依赖

1
2
3
4
5
6
7
8
9
10
11
12
13
14
15
16
17
18
19
20
21
22
23
24
25
26
27
28
29
30
31
32
33
34
35
36
37
38
39
40
41
42
43
44
45
46
47
48
49
50
51
52
53
54
55
56
57
58
59
60
61
62
63
64
65
66
67
68
69
70
71
72
73
74
75
76
77
78
79
80
<?xml version="1.0" encoding="UTF-8"?>
<project xmlns="http://maven.apache.org/POM/4.0.0" xmlns:xsi="http://www.w3.org/2001/XMLSchema-instance"
xsi:schemaLocation="http://maven.apache.org/POM/4.0.0 https://maven.apache.org/xsd/maven-4.0.0.xsd">
<modelVersion>4.0.0</modelVersion>
<parent>
<groupId>org.springframework.boot</groupId>
<artifactId>spring-boot-starter-parent</artifactId>
<version>2.1.8.RELEASE</version>
<relativePath/> <!-- lookup parent from repository -->
</parent>
<groupId>com.ralab</groupId>
<artifactId>ralab-client</artifactId>
<version>0.0.1-SNAPSHOT</version>
<name>ralab-client</name>
<description>Demo project for Spring Boot</description>

<properties>
<java.version>1.8</java.version>
<spring-cloud.version>Greenwich.SR2</spring-cloud.version>
</properties>

<dependencies>
<dependency>
<groupId>org.springframework.boot</groupId>
<artifactId>spring-boot-starter-web</artifactId>
</dependency>
<dependency>
<groupId>org.springframework.cloud</groupId>
<artifactId>spring-cloud-starter-netflix-eureka-client</artifactId>
</dependency>

<dependency>
<groupId>org.springframework.cloud</groupId>
<artifactId>spring-cloud-starter-netflix-hystrix</artifactId>
</dependency>

<dependency>
<groupId>org.springframework.cloud</groupId>
<artifactId>spring-cloud-starter-netflix-hystrix-dashboard</artifactId>
</dependency>

<dependency>
<groupId>org.springframework.boot</groupId>
<artifactId>spring-boot-starter-actuator</artifactId>
</dependency>
<!--添加依赖,获取配置服务器的相关配置信息-->
<dependency>
<groupId>org.springframework.cloud</groupId>
<artifactId>spring-cloud-starter-config</artifactId>
</dependency>

<dependency>
<groupId>org.springframework.boot</groupId>
<artifactId>spring-boot-starter-test</artifactId>
<scope>test</scope>
</dependency>
</dependencies>

<dependencyManagement>
<dependencies>
<dependency>
<groupId>org.springframework.cloud</groupId>
<artifactId>spring-cloud-dependencies</artifactId>
<version>${spring-cloud.version}</version>
<type>pom</type>
<scope>import</scope>
</dependency>
</dependencies>
</dependencyManagement>

<build>
<plugins>
<plugin>
<groupId>org.springframework.boot</groupId>
<artifactId>spring-boot-maven-plugin</artifactId>
</plugin>
</plugins>
</build>

</project>

NlpResource文件

1
2
3
4
5
6
7
8
9
10
11
12
13
14
15
16
17
18
19
20
21
22
23
24
25
26
27
28
29
30
31
32
33
34
35
36
37
38
39
40
41
42
43
package com.ralab.ralabclient.resources;

import com.netflix.hystrix.contrib.javanica.annotation.HystrixCommand;
import org.springframework.beans.factory.annotation.Autowired;
import org.springframework.beans.factory.annotation.Value;
import org.springframework.cloud.context.config.annotation.RefreshScope;
import org.springframework.web.bind.annotation.GetMapping;
import org.springframework.web.bind.annotation.RequestMapping;
import org.springframework.web.bind.annotation.RestController;
import org.springframework.web.client.RestTemplate;

@RestController
@RequestMapping("/nlp")
@RefreshScope
public class NlpResource {

@Autowired
private RestTemplate restTemplate;

@Value("${example.property}")
private String exampleProperty;

@RequestMapping("/config")
public String home() {
return "exampleProperty:" + exampleProperty;
}

@GetMapping("/service")
@HystrixCommand(fallbackMethod = "getFallbackIndex")
public String index()
{
//String result = restTemplate.getForObject("http://localhost:8090/nlp/api", String.class);
String result = restTemplate.getForObject("http://nlp-service/nlp/api", String.class);
return result;
}

private String getFallbackIndex()
{
//String result = restTemplate.getForObject("http://localhost:8090/nlp/api", String.class);

return "不好意思,没有获取到服务端信息";
}
}

bootstrap.yml

1
2
3
4
5
6
7
8
9
10
11
12
13
14
15
16
17
18
19
20
21
22
eureka:
client:
serviceUrl:
defaultZone: http://localhost:8761/eureka/

server:
port: 8091
management:
endpoints:
web:
exposure:
include: hystrix.stream

spring:
application:
name: nlp-client
cloud:
config:
uri: http://localhost:8888
name: licensingservice
profile: default
label: master

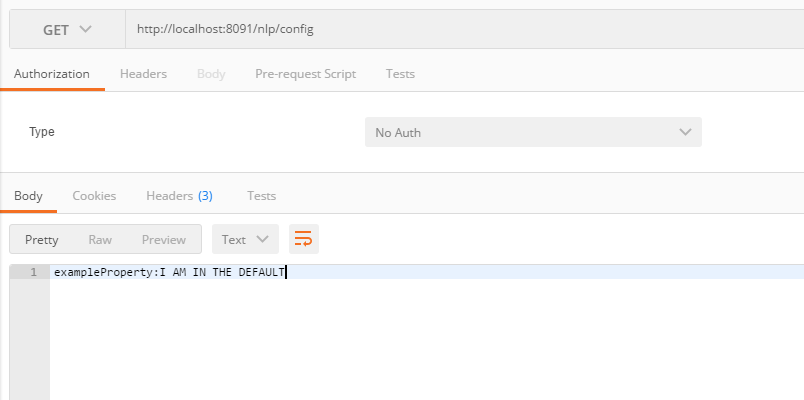
运行RalabClientApplication,打开http://localhost:8091/nlp/config

补充:如果配置服务器的配置信息作了修改,这时我们的微服务配置客户端可以主动拉取(pull)
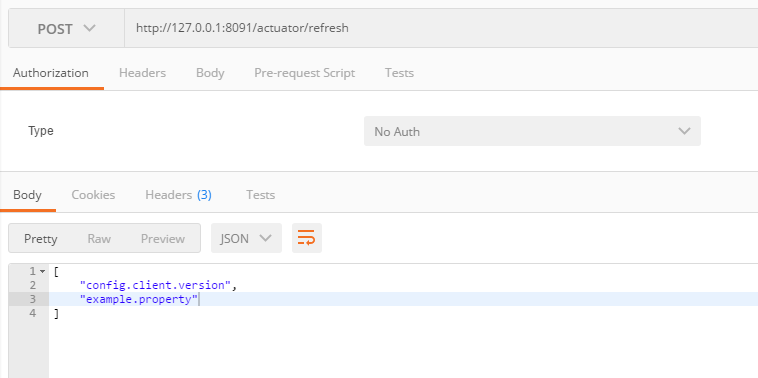
在获取配置属性的类上加注解,@RefreshScope,然后发送post请求http://127.0.0.1:8091/actuator/refresh

在spring cloud建构的微服务架构中,多个微服务有时需要统一配置信息,这时我们可以建立配置服务器ralab-configserver,然后各微服务从该配置服务器获取配置信息

ralab-configserver服务器

  • New microservice ‘ralab-configserver’ and add the Maven spring-cloud-config-server denpendency
  • Add @EnableConfigServer to the application class
  • Add github repository url to application.yml file

配置服务器的pom.xml文件如下:

1
2
3
4
5
6
7
8
9
10
11
12
13
14
15
16
17
18
19
20
21
22
23
24
25
26
27
28
29
30
31
32
33
34
35
36
37
38
39
40
41
42
43
44
45
46
47
48
49
50
51
52
53
54
55
56
<?xml version="1.0" encoding="UTF-8"?>
<project xmlns="http://maven.apache.org/POM/4.0.0" xmlns:xsi="http://www.w3.org/2001/XMLSchema-instance"
xsi:schemaLocation="http://maven.apache.org/POM/4.0.0 https://maven.apache.org/xsd/maven-4.0.0.xsd">
<modelVersion>4.0.0</modelVersion>
<parent>
<groupId>org.springframework.boot</groupId>
<artifactId>spring-boot-starter-parent</artifactId>
<version>2.1.8.RELEASE</version>
<relativePath/> <!-- lookup parent from repository -->
</parent>
<groupId>com.ralab</groupId>
<artifactId>ralab-configserver</artifactId>
<version>0.0.1-SNAPSHOT</version>
<name>ralab-configserver</name>
<description>Demo project for Spring Boot</description>

<properties>
<java.version>1.8</java.version>
<spring-cloud.version>Greenwich.SR3</spring-cloud.version>
</properties>

<dependencies>
<dependency>
<groupId>org.springframework.cloud</groupId>
<artifactId>spring-cloud-config-server</artifactId>
</dependency>

<dependency>
<groupId>org.springframework.boot</groupId>
<artifactId>spring-boot-starter-test</artifactId>
<scope>test</scope>
</dependency>
</dependencies>

<dependencyManagement>
<dependencies>
<dependency>
<groupId>org.springframework.cloud</groupId>
<artifactId>spring-cloud-dependencies</artifactId>
<version>${spring-cloud.version}</version>
<type>pom</type>
<scope>import</scope>
</dependency>
</dependencies>
</dependencyManagement>

<build>
<plugins>
<plugin>
<groupId>org.springframework.boot</groupId>
<artifactId>spring-boot-maven-plugin</artifactId>
</plugin>
</plugins>
</build>

</project>

RalabConfigserverApplication文件

1
2
3
4
5
6
7
8
9
10
11
12
13
14
15
package com.ralab.ralabconfigserver;

import org.springframework.boot.SpringApplication;
import org.springframework.boot.autoconfigure.SpringBootApplication;
import org.springframework.cloud.config.server.EnableConfigServer;

@SpringBootApplication
@EnableConfigServer
public class RalabConfigserverApplication {

public static void main(String[] args) {
SpringApplication.run(RalabConfigserverApplication.class, args);
}

}

bootstrap.yml

1
2
3
spring:
application:
name: configserver

application.yml

1
2
3
4
5
6
7
8
9
10
server:
port: 8888
spring:
cloud:
config:
server:
encrypt.enabled: false
git:
uri: https://github.com/chenying99/config-repo
searchPaths: licensingservice,organizationservice

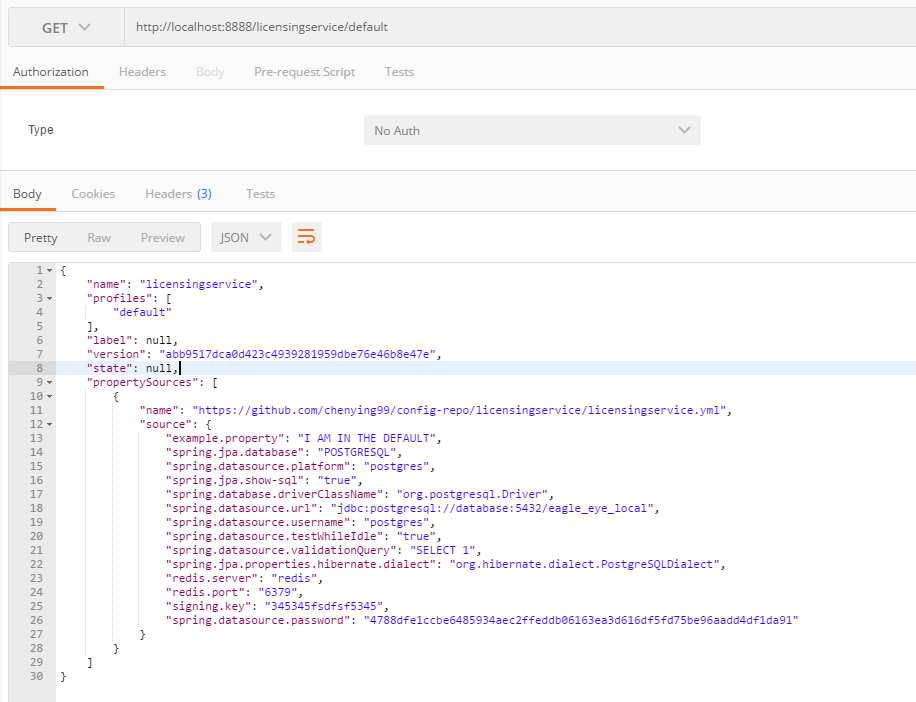
运行RalabConfigserverApplication,然后打开http://localhost:8888/licensingservice/default

前面的文章,我们利用RestTemplate对象和feign组件实现了微服务之间的通信,并且通过集成Hystrix,从而实现了容错及故障恢复功能

本文主要实现对Hystrix的可视化监控

这里新建微服务’ralab-hystrix-dashboard’

  • New microsevice ralab-hystrix-dashboard and add the Maven spring-cloud-starter-netflix-hystrix-dashboard denpendency
  • Add @EnableHystrixDashboard to the application class
  • Config info to application.yml file

同时被监控的微服务

  • Add spring-boot-starter-actuator denpendency
  • Add management.endpoints.web.exposure.include=hystrix.stream parameter to the application file

微服务’ralab-hystrix-dashboard’pom.xml文件如下:

1
2
3
4
5
6
7
8
9
10
11
12
13
14
15
16
17
18
19
20
21
22
23
24
25
26
27
28
29
30
31
32
33
34
35
36
37
38
39
40
41
42
43
44
45
46
47
48
49
50
51
52
53
54
55
56
<?xml version="1.0" encoding="UTF-8"?>
<project xmlns="http://maven.apache.org/POM/4.0.0" xmlns:xsi="http://www.w3.org/2001/XMLSchema-instance"
xsi:schemaLocation="http://maven.apache.org/POM/4.0.0 https://maven.apache.org/xsd/maven-4.0.0.xsd">
<modelVersion>4.0.0</modelVersion>
<parent>
<groupId>org.springframework.boot</groupId>
<artifactId>spring-boot-starter-parent</artifactId>
<version>2.1.8.RELEASE</version>
<relativePath/> <!-- lookup parent from repository -->
</parent>
<groupId>com.ralab</groupId>
<artifactId>ralab-hystrix-dashboard</artifactId>
<version>0.0.1-SNAPSHOT</version>
<name>ralab-hystrix-dashboard</name>
<description>Demo project for Spring Boot</description>

<properties>
<java.version>1.8</java.version>
<spring-cloud.version>Greenwich.SR3</spring-cloud.version>
</properties>

<dependencies>
<dependency>
<groupId>org.springframework.cloud</groupId>
<artifactId>spring-cloud-starter-netflix-hystrix-dashboard</artifactId>
</dependency>

<dependency>
<groupId>org.springframework.boot</groupId>
<artifactId>spring-boot-starter-test</artifactId>
<scope>test</scope>
</dependency>
</dependencies>

<dependencyManagement>
<dependencies>
<dependency>
<groupId>org.springframework.cloud</groupId>
<artifactId>spring-cloud-dependencies</artifactId>
<version>${spring-cloud.version}</version>
<type>pom</type>
<scope>import</scope>
</dependency>
</dependencies>
</dependencyManagement>

<build>
<plugins>
<plugin>
<groupId>org.springframework.boot</groupId>
<artifactId>spring-boot-maven-plugin</artifactId>
</plugin>
</plugins>
</build>

</project>

RalabHystrixDashboardApplication文件

1
2
3
4
5
6
7
8
9
10
11
12
13
14
15
package com.ralab.ralabhystrixdashboard;

import org.springframework.boot.SpringApplication;
import org.springframework.boot.autoconfigure.SpringBootApplication;
import org.springframework.cloud.netflix.hystrix.dashboard.EnableHystrixDashboard;

@SpringBootApplication
@EnableHystrixDashboard
public class RalabHystrixDashboardApplication {

public static void main(String[] args) {
SpringApplication.run(RalabHystrixDashboardApplication.class, args);
}

}

application.yml文件

1
2
3
4
5
spring:
application:
name: hystrix-dashboard
server:
port: 8080

运行RalabHystrixDashboardApplication,打开http://localhost:8080/hystrix

同时被监控的微服务加入依赖

1
2
3
4
<dependency>
<groupId>org.springframework.boot</groupId>
<artifactId>spring-boot-starter-actuator</artifactId>
</dependency>

曝露hystrix端点

1
2
3
spring.application.name=nlp-client
server.port=8091
management.endpoints.web.exposure.include=hystrix.stream

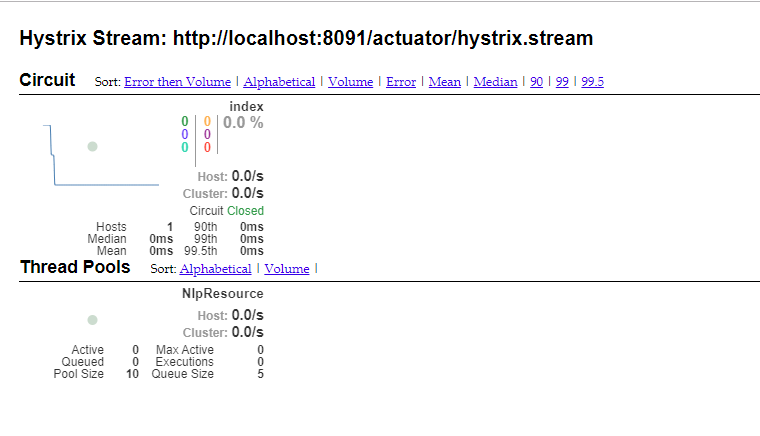
这时在输入框输入’http://localhost:8091/actuator/hystrix.stream',点击Monitor stream按钮,就可以看到如下页面了

注:spring cloud还提供了turbine组件对多个微服务的Hystrix信息进行聚合,从而实现对微服务cluster的Hystrix信息的可视化监控

上文我们采用feign组件与微服务’ralab-nlp’进行通信,在实际应用中,feign组件通过集成Hystrix,从而实现熔断机制
改造微服务’ralab-client’

  • Add the Maven spring-cloud-starter-netflix-hystrix denpendency
  • Config hystrix info to bootstrap.yml file
  • Add FeignClient fallback class by Implement EurekaFeignService Interface
    我们在前面的文章中已经添加了spring-cloud-starter-netflix-hystrix依赖
    1
    2
    3
    4
    <dependency>
    <groupId>org.springframework.cloud</groupId>
    <artifactId>spring-cloud-starter-netflix-hystrix</artifactId>
    </dependency>

bootstrap.yml

1
2
3
4
5
6
7
8
9
10
11
12
13
14
15
16
17
18
19
20
21
22
23
24
25
26
27
28
29
30
31
eureka:
instance:
# ip-address: 127.0.0.1
prefer-ip-address: true # 补充
client:
serviceUrl:
defaultZone: http://localhost:8761/eureka/

server:
port: 8091
management:
endpoints:
web:
exposure:
include: hystrix.stream

spring:
application:
name: nlp-client
cloud:
config:
name: licensingservice
profile: default
label: master
discovery:
enabled: true
service-id: configserver

feign:
hystrix:
enabled: true

EurekaFeignService文件

1
2
3
4
5
6
7
8
9
10
11
12
13
14
15
16
17
18
19
20
package com.ralab.ralabclient.services;

import org.springframework.cloud.openfeign.FeignClient;
import org.springframework.stereotype.Component;
import org.springframework.web.bind.annotation.RequestMapping;

@FeignClient(value = "nlp-service",fallback = EurekaFeignServiceFailure.class)
public interface EurekaFeignService {

@RequestMapping(value = "nlp/api")
String nlpService();
}

@Component
class EurekaFeignServiceFailure implements EurekaFeignService {
@Override
public String nlpService() {
return "不好意思,feingn调用失败";
}
}

NlpResource文件 注释@HystrixCommand注解

1
2
3
4
5
6
7
8
9
10
11
12
13
14
15
16
17
18
19
20
21
22
23
24
25
26
27
28
29
30
31
32
33
34
35
36
37
38
39
40
41
42
43
44
45
46
47
48
49
50
51
52
53
54
55
56
package com.ralab.ralabclient.resources;

import com.netflix.hystrix.contrib.javanica.annotation.HystrixCommand;
import com.ralab.ralabclient.services.EurekaFeignService;
import org.springframework.beans.factory.annotation.Autowired;
import org.springframework.beans.factory.annotation.Value;
import org.springframework.cloud.context.config.annotation.RefreshScope;
import org.springframework.web.bind.annotation.GetMapping;
import org.springframework.web.bind.annotation.RequestMapping;
import org.springframework.web.bind.annotation.RestController;
import org.springframework.web.client.RestTemplate;

@RestController
@RequestMapping("/nlp")
@RefreshScope
public class NlpResource {

@Autowired
private RestTemplate restTemplate;

@Autowired
private EurekaFeignService eurekaFeignService;

@Value("${example.property}")
private String exampleProperty;

@RequestMapping("/config")
public String home() {
return "exampleProperty:" + exampleProperty;
}

@GetMapping("/service")
@HystrixCommand(fallbackMethod = "getFallbackIndex")
public String index()
{
//String result = restTemplate.getForObject("http://localhost:8090/nlp/api", String.class);
String result = restTemplate.getForObject("http://nlp-service/nlp/api", String.class);
return result;
}

@GetMapping("/feign")
//@HystrixCommand(fallbackMethod = "getFallbackIndex")
public String feignservice()
{
//String result = restTemplate.getForObject("http://localhost:8090/nlp/api", String.class);
String result = eurekaFeignService.nlpService();
return result;
}

private String getFallbackIndex()
{
//String result = restTemplate.getForObject("http://localhost:8090/nlp/api", String.class);

return "不好意思,没有获取到服务端信息";
}
}

这时停止微服务’ralab-nlp’,打开http://localhost:8091/nlp/feign