在实际应用中,spring cloud通常feign组件与服务提供者进行通信,feign有着更友好的api调用方式
我们改造微服务’ralab-client’

  • Add the Maven spring-cloud-config-server denpendency
  • Add @EnableFeignClients to the application class
  • Add FeignClient Interface communicate to microservice ‘ralab-nlp’
  • Add invoke Interface to RestController NlpResource
    1
    2
    3
    4
    5
    6
    7
    8
    9
    10
    11
    12
    13
    14
    15
    16
    17
    18
    19
    20
    21
    22
    23
    24
    25
    26
    27
    28
    29
    30
    31
    32
    33
    34
    35
    36
    37
    38
    39
    40
    41
    42
    43
    44
    45
    46
    47
    48
    49
    50
    51
    52
    53
    54
    55
    56
    57
    58
    59
    60
    61
    62
    63
    64
    65
    66
    67
    68
    69
    70
    71
    72
    73
    74
    75
    76
    77
    78
    79
    80
    <?xml version="1.0" encoding="UTF-8"?>
    <project xmlns="http://maven.apache.org/POM/4.0.0" xmlns:xsi="http://www.w3.org/2001/XMLSchema-instance"
    xsi:schemaLocation="http://maven.apache.org/POM/4.0.0 https://maven.apache.org/xsd/maven-4.0.0.xsd">
    <modelVersion>4.0.0</modelVersion>
    <parent>
    <groupId>org.springframework.boot</groupId>
    <artifactId>spring-boot-starter-parent</artifactId>
    <version>2.1.8.RELEASE</version>
    <relativePath/> <!-- lookup parent from repository -->
    </parent>
    <groupId>com.ralab</groupId>
    <artifactId>ralab-client</artifactId>
    <version>0.0.1-SNAPSHOT</version>
    <name>ralab-client</name>
    <description>Demo project for Spring Boot</description>

    <properties>
    <java.version>1.8</java.version>
    <spring-cloud.version>Greenwich.SR3</spring-cloud.version>
    </properties>

    <dependencies>
    <dependency>
    <groupId>org.springframework.boot</groupId>
    <artifactId>spring-boot-starter-web</artifactId>
    </dependency>
    <dependency>
    <groupId>org.springframework.cloud</groupId>
    <artifactId>spring-cloud-starter-netflix-eureka-client</artifactId>
    </dependency>

    <dependency>
    <groupId>org.springframework.cloud</groupId>
    <artifactId>spring-cloud-starter-openfeign</artifactId>
    </dependency>

    <dependency>
    <groupId>org.springframework.cloud</groupId>
    <artifactId>spring-cloud-starter-netflix-hystrix</artifactId>
    </dependency>

    <dependency>
    <groupId>org.springframework.boot</groupId>
    <artifactId>spring-boot-starter-actuator</artifactId>
    </dependency>
    <!--添加依赖,获取配置服务器的相关配置信息-->
    <dependency>
    <groupId>org.springframework.cloud</groupId>
    <artifactId>spring-cloud-starter-config</artifactId>
    </dependency>

    <dependency>
    <groupId>org.springframework.boot</groupId>
    <artifactId>spring-boot-starter-test</artifactId>
    <scope>test</scope>
    </dependency>
    </dependencies>

    <dependencyManagement>
    <dependencies>
    <dependency>
    <groupId>org.springframework.cloud</groupId>
    <artifactId>spring-cloud-dependencies</artifactId>
    <version>${spring-cloud.version}</version>
    <type>pom</type>
    <scope>import</scope>
    </dependency>
    </dependencies>
    </dependencyManagement>

    <build>
    <plugins>
    <plugin>
    <groupId>org.springframework.boot</groupId>
    <artifactId>spring-boot-maven-plugin</artifactId>
    </plugin>
    </plugins>
    </build>

    </project>

RalabClientApplication文件

1
2
3
4
5
6
7
8
9
10
11
12
13
14
15
16
17
18
19
20
21
22
23
24
25
26
27
28
29
30
package com.ralab.ralabclient;

import org.springframework.boot.SpringApplication;
import org.springframework.boot.autoconfigure.SpringBootApplication;
import org.springframework.cloud.client.circuitbreaker.EnableCircuitBreaker;
import org.springframework.cloud.client.loadbalancer.LoadBalanced;
import org.springframework.cloud.context.config.annotation.RefreshScope;
import org.springframework.cloud.netflix.eureka.EnableEurekaClient;
import org.springframework.cloud.openfeign.EnableFeignClients;
import org.springframework.context.annotation.Bean;
import org.springframework.web.client.RestTemplate;

@SpringBootApplication
@EnableEurekaClient
@EnableCircuitBreaker
@EnableFeignClients
public class RalabClientApplication {

@Bean
@LoadBalanced
public RestTemplate getRestTemplate()
{
return new RestTemplate();
}

public static void main(String[] args) {
SpringApplication.run(RalabClientApplication.class, args);
}

}

EurekaFeignService文件

1
2
3
4
5
6
7
8
9
10
11
12
package com.ralab.ralabclient.services;

import org.springframework.cloud.openfeign.FeignClient;
import org.springframework.stereotype.Component;
import org.springframework.web.bind.annotation.RequestMapping;

@FeignClient(value = "nlp-service")
public interface EurekaFeignService {

@RequestMapping(value = "nlp/api")
String nlpService();
}

然后在NlpResource调用上面的feign接口

1
2
3
4
5
6
7
8
9
10
11
12
13
14
15
16
17
18
19
20
21
22
23
24
25
26
27
28
29
30
31
32
33
34
35
36
37
38
39
40
41
42
43
44
45
46
47
48
49
50
51
52
53
54
55
package com.ralab.ralabclient.resources;

import com.netflix.hystrix.contrib.javanica.annotation.HystrixCommand;
import com.ralab.ralabclient.services.EurekaFeignService;
import org.springframework.beans.factory.annotation.Autowired;
import org.springframework.beans.factory.annotation.Value;
import org.springframework.cloud.context.config.annotation.RefreshScope;
import org.springframework.web.bind.annotation.GetMapping;
import org.springframework.web.bind.annotation.RequestMapping;
import org.springframework.web.bind.annotation.RestController;
import org.springframework.web.client.RestTemplate;

@RestController
@RequestMapping("/nlp")
@RefreshScope
public class NlpResource {

@Autowired
private RestTemplate restTemplate;

@Autowired
private EurekaFeignService eurekaFeignService;

@Value("${example.property}")
private String exampleProperty;

@RequestMapping("/config")
public String home() {
return "exampleProperty:" + exampleProperty;
}

@GetMapping("/service")
@HystrixCommand(fallbackMethod = "getFallbackIndex")
public String index()
{
//String result = restTemplate.getForObject("http://localhost:8090/nlp/api", String.class);
String result = restTemplate.getForObject("http://nlp-service/nlp/api", String.class);
return result;
}

@GetMapping("/feign")
@HystrixCommand(fallbackMethod = "getFallbackIndex")
public String feignservice()
{
String result = eurekaFeignService.nlpService();
return result;
}

private String getFallbackIndex()
{
//String result = restTemplate.getForObject("http://localhost:8090/nlp/api", String.class);

return "不好意思,没有获取到服务端信息";
}
}

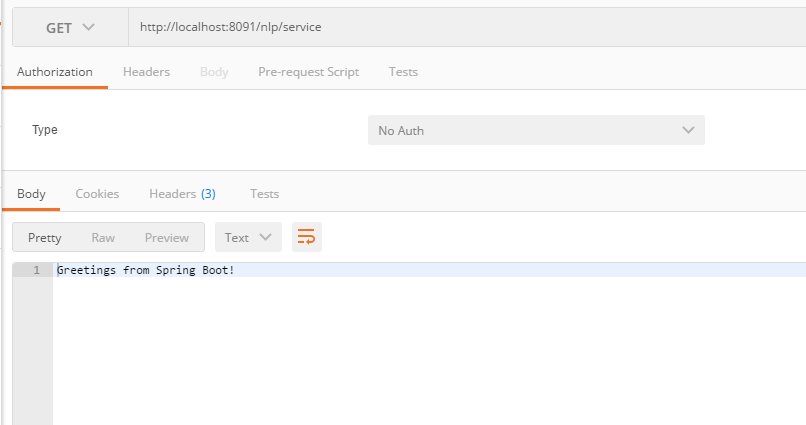
运行RalabClientApplication,打开http://localhost:8091/nlp/feign
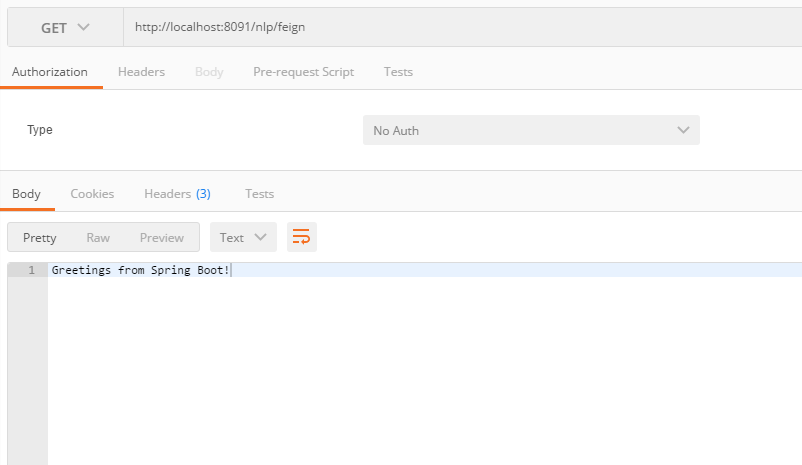
前面的文章主要探索的是微服务通信及服务发现(Communication and Discovery),接下来要解决的是容错及故障恢复(Fault Tolerance and Resilience)
当某个微服务出现故障时,确保系统能够正常运行及从故障中恢复
spring cloud采用了一种称之为断路器(Circuit breaker)的模式,本文主要演示该模式的Hystrix实现

这里是基于微服务’ralab-client’

  • Add the Maven spring-cloud-starter-netflix-hystrix denpendency
  • Add @EnableCircuitBreaker to the application class
  • Add @HystrixCommand to methods that need circuit breakers
  • configure Hystrix behavior
    其pom.xml文件如下:
    1
    2
    3
    4
    5
    6
    7
    8
    9
    10
    11
    12
    13
    14
    15
    16
    17
    18
    19
    20
    21
    22
    23
    24
    25
    26
    27
    28
    29
    30
    31
    32
    33
    34
    35
    36
    37
    38
    39
    40
    41
    42
    43
    44
    45
    46
    47
    48
    49
    50
    51
    52
    53
    54
    55
    56
    57
    58
    59
    60
    61
    62
    63
    64
    65
    <?xml version="1.0" encoding="UTF-8"?>
    <project xmlns="http://maven.apache.org/POM/4.0.0" xmlns:xsi="http://www.w3.org/2001/XMLSchema-instance"
    xsi:schemaLocation="http://maven.apache.org/POM/4.0.0 https://maven.apache.org/xsd/maven-4.0.0.xsd">
    <modelVersion>4.0.0</modelVersion>
    <parent>
    <groupId>org.springframework.boot</groupId>
    <artifactId>spring-boot-starter-parent</artifactId>
    <version>2.1.8.RELEASE</version>
    <relativePath/> <!-- lookup parent from repository -->
    </parent>
    <groupId>com.ralab</groupId>
    <artifactId>ralab-client</artifactId>
    <version>0.0.1-SNAPSHOT</version>
    <name>ralab-client</name>
    <description>Demo project for Spring Boot</description>

    <properties>
    <java.version>1.8</java.version>
    <spring-cloud.version>Greenwich.SR2</spring-cloud.version>
    </properties>

    <dependencies>
    <dependency>
    <groupId>org.springframework.boot</groupId>
    <artifactId>spring-boot-starter-web</artifactId>
    </dependency>
    <dependency>
    <groupId>org.springframework.cloud</groupId>
    <artifactId>spring-cloud-starter-netflix-eureka-client</artifactId>
    </dependency>

    <dependency>
    <groupId>org.springframework.cloud</groupId>
    <artifactId>spring-cloud-starter-netflix-hystrix</artifactId>
    </dependency>

    <dependency>
    <groupId>org.springframework.boot</groupId>
    <artifactId>spring-boot-starter-test</artifactId>
    <scope>test</scope>
    </dependency>
    </dependencies>

    <dependencyManagement>
    <dependencies>
    <dependency>
    <groupId>org.springframework.cloud</groupId>
    <artifactId>spring-cloud-dependencies</artifactId>
    <version>${spring-cloud.version}</version>
    <type>pom</type>
    <scope>import</scope>
    </dependency>
    </dependencies>
    </dependencyManagement>

    <build>
    <plugins>
    <plugin>
    <groupId>org.springframework.boot</groupId>
    <artifactId>spring-boot-maven-plugin</artifactId>
    </plugin>
    </plugins>
    </build>

    </project>

RalabClientApplication文件

1
2
3
4
5
6
7
8
9
10
11
12
13
14
15
16
17
18
19
20
21
22
23
24
25
26
27
package com.ralab.ralabclient;

import org.springframework.boot.SpringApplication;
import org.springframework.boot.autoconfigure.SpringBootApplication;
import org.springframework.cloud.client.circuitbreaker.EnableCircuitBreaker;
import org.springframework.cloud.client.loadbalancer.LoadBalanced;
import org.springframework.cloud.netflix.eureka.EnableEurekaClient;
import org.springframework.context.annotation.Bean;
import org.springframework.web.client.RestTemplate;

@SpringBootApplication
@EnableEurekaClient
@EnableCircuitBreaker
public class RalabClientApplication {

@Bean
@LoadBalanced
public RestTemplate getRestTemplate()
{
return new RestTemplate();
}

public static void main(String[] args) {
SpringApplication.run(RalabClientApplication.class, args);
}

}

NlpResource文件

1
2
3
4
5
6
7
8
9
10
11
12
13
14
15
16
17
18
19
20
21
22
23
24
25
26
27
28
29
30
31
32
package com.ralab.ralabclient.resources;

import com.netflix.hystrix.contrib.javanica.annotation.HystrixCommand;
import org.springframework.beans.factory.annotation.Autowired;
import org.springframework.web.bind.annotation.GetMapping;
import org.springframework.web.bind.annotation.RequestMapping;
import org.springframework.web.bind.annotation.RestController;
import org.springframework.web.client.RestTemplate;

@RestController
@RequestMapping("/nlp")
public class NlpResource {

@Autowired
private RestTemplate restTemplate;

@GetMapping("/service")
@HystrixCommand(fallbackMethod = "getFallbackIndex")
public String index()
{
//String result = restTemplate.getForObject("http://localhost:8090/nlp/api", String.class);
String result = restTemplate.getForObject("http://nlp-service/nlp/api", String.class);
return result;
}

private String getFallbackIndex()
{
//String result = restTemplate.getForObject("http://localhost:8090/nlp/api", String.class);

return "不好意思,没有获取到服务端信息";
}
}

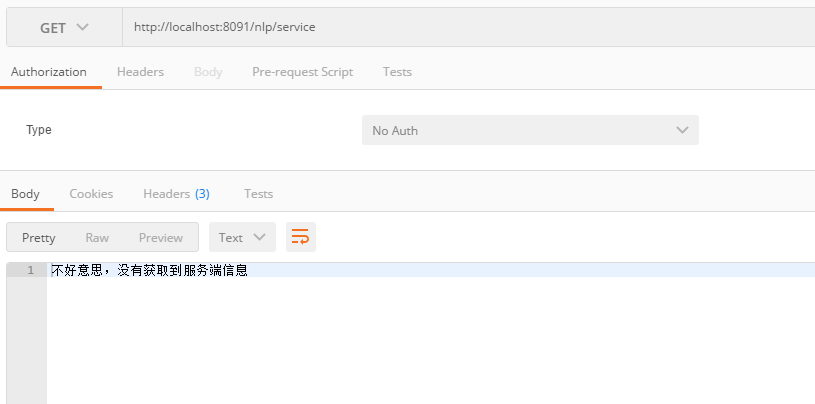
先停止微服务’ralab-nlp’,重新运行RalabClientApplication,测试http://localhost:8091/nlp/service

上面利用Hystrix实现了微服务’ralab-client’的容错及故障恢复功能,在其需要容错的方法上,还可以自定义相关参数,这里不再演示

建立注册服务器(ralab-server)并服务提供者(ralab-nlp)向其注册后,这时服务消费者(ralab-client,服务消费者也向注册服务器注册)可以通过访问注册服务器,查找服务实例名的方式查找服务提供者的相关信息,然后调用其服务

这里基于微服务’ralab-client’

  • Add @LoadBalanced to the RestTemplate Instance
  • Edit RestTemplate url parameter host as ‘nlp-service’

服务消费者ralab-client
RalabClientApplication文件

1
2
3
4
5
6
7
8
9
10
11
12
13
14
15
16
17
18
19
20
21
22
23
24
25
package com.ralab.ralabclient;

import org.springframework.boot.SpringApplication;
import org.springframework.boot.autoconfigure.SpringBootApplication;
import org.springframework.cloud.client.loadbalancer.LoadBalanced;
import org.springframework.cloud.netflix.eureka.EnableEurekaClient;
import org.springframework.context.annotation.Bean;
import org.springframework.web.client.RestTemplate;

@SpringBootApplication
@EnableEurekaClient
public class RalabClientApplication {

@Bean
@LoadBalanced
public RestTemplate getRestTemplate()
{
return new RestTemplate();
}

public static void main(String[] args) {
SpringApplication.run(RalabClientApplication.class, args);
}

}

修改NlpResource文件

1
2
3
4
5
6
7
8
9
10
11
12
13
14
15
16
17
18
19
20
21
22
23
package com.ralab.ralabclient.resources;

import org.springframework.beans.factory.annotation.Autowired;
import org.springframework.web.bind.annotation.GetMapping;
import org.springframework.web.bind.annotation.RequestMapping;
import org.springframework.web.bind.annotation.RestController;
import org.springframework.web.client.RestTemplate;

@RestController
@RequestMapping("/nlp")
public class NlpResource {

@Autowired
private RestTemplate restTemplate;

@GetMapping("/service")
public String index()
{
//String result = restTemplate.getForObject("http://localhost:8090/nlp/api", String.class);
String result = restTemplate.getForObject("http://nlp-service/nlp/api", String.class);
return result;
}
}

运行RalabClientApplication

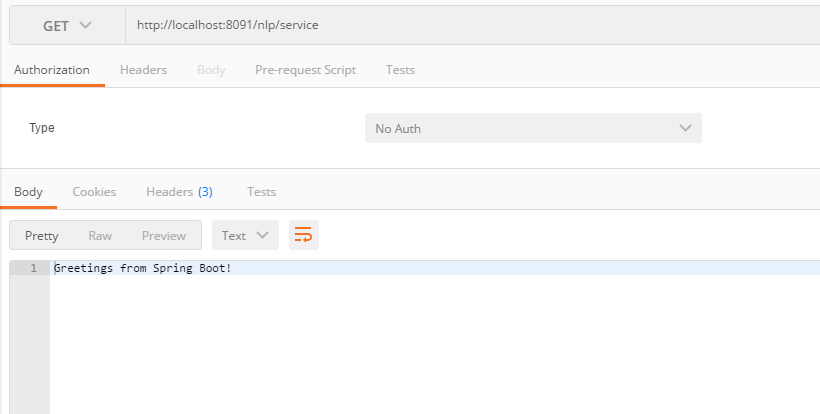
测试http://localhost:8091/nlp/service

这里基于微服务’ralab-nlp’和’ralab-client’

  • Add the Maven spring-cloud-starter-netflix-eureka-client denpendency
  • Add @EnableEurekaClient to the application class
  • Add spring.application.name parameter to the application.properties file

这时修改服务提供者ralab-nlp的pom.xml文件,引入eureka-client依赖

1
2
3
4
5
6
7
8
9
10
11
12
13
14
15
16
17
18
19
20
21
22
23
24
25
26
27
28
29
30
31
32
33
34
35
36
37
38
39
40
41
42
43
44
45
46
47
48
49
50
51
52
53
54
55
56
57
58
59
60
<?xml version="1.0" encoding="UTF-8"?>
<project xmlns="http://maven.apache.org/POM/4.0.0" xmlns:xsi="http://www.w3.org/2001/XMLSchema-instance"
xsi:schemaLocation="http://maven.apache.org/POM/4.0.0 https://maven.apache.org/xsd/maven-4.0.0.xsd">
<modelVersion>4.0.0</modelVersion>
<parent>
<groupId>org.springframework.boot</groupId>
<artifactId>spring-boot-starter-parent</artifactId>
<version>2.1.8.RELEASE</version>
<relativePath/> <!-- lookup parent from repository -->
</parent>
<groupId>com.ralab</groupId>
<artifactId>ralab-nlp</artifactId>
<version>0.0.1-SNAPSHOT</version>
<name>ralab-nlp</name>
<description>Demo project for Spring Boot</description>

<properties>
<java.version>1.8</java.version>
<spring-cloud.version>Greenwich.SR2</spring-cloud.version>
</properties>

<dependencies>
<dependency>
<groupId>org.springframework.boot</groupId>
<artifactId>spring-boot-starter-web</artifactId>
</dependency>
<dependency>
<groupId>org.springframework.cloud</groupId>
<artifactId>spring-cloud-starter-netflix-eureka-client</artifactId>
</dependency>

<dependency>
<groupId>org.springframework.boot</groupId>
<artifactId>spring-boot-starter-test</artifactId>
<scope>test</scope>
</dependency>
</dependencies>

<dependencyManagement>
<dependencies>
<dependency>
<groupId>org.springframework.cloud</groupId>
<artifactId>spring-cloud-dependencies</artifactId>
<version>${spring-cloud.version}</version>
<type>pom</type>
<scope>import</scope>
</dependency>
</dependencies>
</dependencyManagement>

<build>
<plugins>
<plugin>
<groupId>org.springframework.boot</groupId>
<artifactId>spring-boot-maven-plugin</artifactId>
</plugin>
</plugins>
</build>

</project>

修改RalabNlpApplication文件

1
2
3
4
5
6
7
8
9
10
11
12
13
14
15
16
17
18
package com.ralab.ralabnlp;

import org.springframework.boot.SpringApplication;
import org.springframework.boot.autoconfigure.SpringBootApplication;
import org.springframework.cloud.netflix.eureka.EnableEurekaClient;
import org.springframework.context.annotation.ComponentScan;

//(scanBasePackages = { "com.ralab.nlp.controller"})
//@ComponentScan({"com.ralab.nlp.controller"})
@SpringBootApplication
@EnableEurekaClient
public class RalabNlpApplication {

public static void main(String[] args) {
SpringApplication.run(RalabNlpApplication.class, args);
}

}

修改application.properties文件
spring.application.name=nlp-service
server.port=8090

运行RalabNlpApplication

同时修改服务消费者ralab-client的pom.xml文件,引入eureka-client依赖

1
2
3
4
5
6
7
8
9
10
11
12
13
14
15
16
17
18
19
20
21
22
23
24
25
26
27
28
29
30
31
32
33
34
35
36
37
38
39
40
41
42
43
44
45
46
47
48
49
50
51
52
53
54
55
56
57
58
59
60
<?xml version="1.0" encoding="UTF-8"?>
<project xmlns="http://maven.apache.org/POM/4.0.0" xmlns:xsi="http://www.w3.org/2001/XMLSchema-instance"
xsi:schemaLocation="http://maven.apache.org/POM/4.0.0 https://maven.apache.org/xsd/maven-4.0.0.xsd">
<modelVersion>4.0.0</modelVersion>
<parent>
<groupId>org.springframework.boot</groupId>
<artifactId>spring-boot-starter-parent</artifactId>
<version>2.1.8.RELEASE</version>
<relativePath/> <!-- lookup parent from repository -->
</parent>
<groupId>com.ralab</groupId>
<artifactId>ralab-client</artifactId>
<version>0.0.1-SNAPSHOT</version>
<name>ralab-client</name>
<description>Demo project for Spring Boot</description>

<properties>
<java.version>1.8</java.version>
<spring-cloud.version>Greenwich.SR2</spring-cloud.version>
</properties>

<dependencies>
<dependency>
<groupId>org.springframework.boot</groupId>
<artifactId>spring-boot-starter-web</artifactId>
</dependency>
<dependency>
<groupId>org.springframework.cloud</groupId>
<artifactId>spring-cloud-starter-netflix-eureka-client</artifactId>
</dependency>

<dependency>
<groupId>org.springframework.boot</groupId>
<artifactId>spring-boot-starter-test</artifactId>
<scope>test</scope>
</dependency>
</dependencies>

<dependencyManagement>
<dependencies>
<dependency>
<groupId>org.springframework.cloud</groupId>
<artifactId>spring-cloud-dependencies</artifactId>
<version>${spring-cloud.version}</version>
<type>pom</type>
<scope>import</scope>
</dependency>
</dependencies>
</dependencyManagement>

<build>
<plugins>
<plugin>
<groupId>org.springframework.boot</groupId>
<artifactId>spring-boot-maven-plugin</artifactId>
</plugin>
</plugins>
</build>

</project>

修改RalabClientApplication文件

1
2
3
4
5
6
7
8
9
10
11
12
13
14
15
16
17
18
19
20
21
22
23
package com.ralab.ralabclient;

import org.springframework.boot.SpringApplication;
import org.springframework.boot.autoconfigure.SpringBootApplication;
import org.springframework.cloud.netflix.eureka.EnableEurekaClient;
import org.springframework.context.annotation.Bean;
import org.springframework.web.client.RestTemplate;

@SpringBootApplication
@EnableEurekaClient
public class RalabClientApplication {

@Bean
public RestTemplate getRestTemplate()
{
return new RestTemplate();
}

public static void main(String[] args) {
SpringApplication.run(RalabClientApplication.class, args);
}

}

修改application.properties文件
spring.application.name=nlp-client
server.port=8091

运行RalabClientApplication

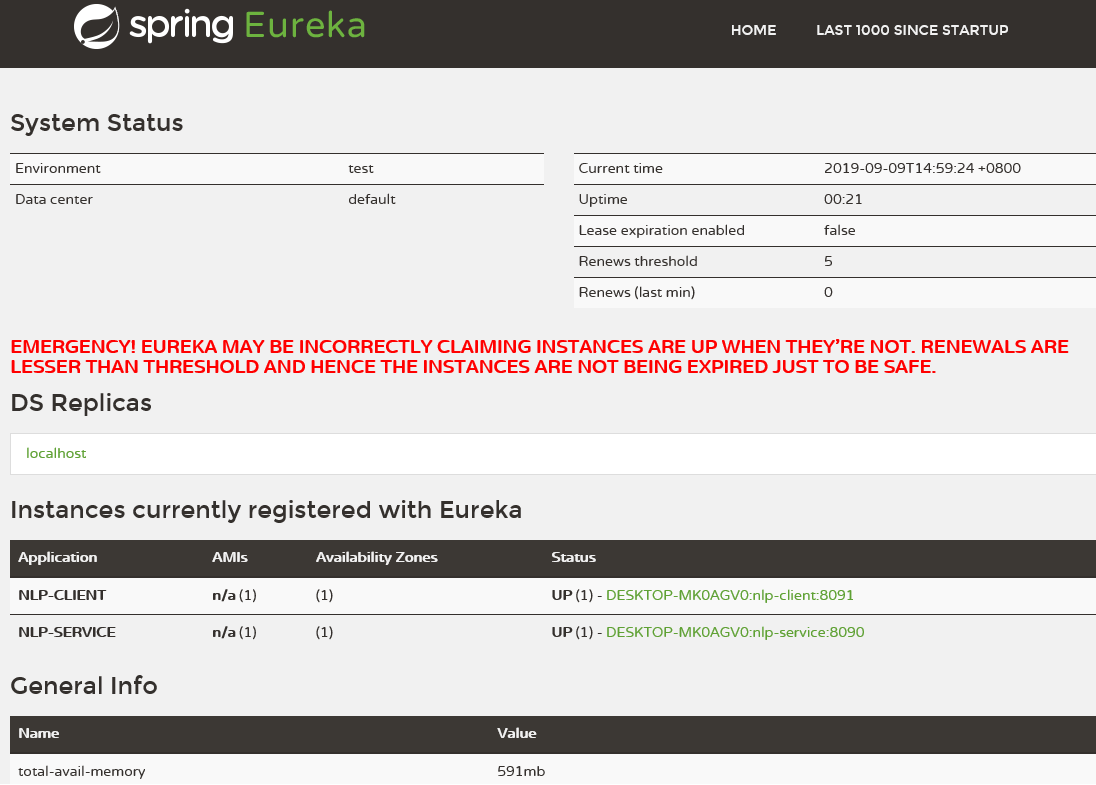
这时在浏览器打开http://localhost:8761/

可以看到注册实例nlp-service和nlp-client

前两文中的建立的项目,在逻辑上可分为服务提供者(ralab-nlp)和服务消费者(ralab-client),服务消费者采用RestTemplate与之通信
在spring cloude中,采用了服务注册的方式,所有的服务提供者及服务消费者都向注册服务器注册,然后服务消费者从注册服务器上查询相关服务

微服务’ralab-server’

  • New microservice ‘ralab-server’ and add the Maven spring-cloud-starter-netflix-eureka-server denpendency
  • Add @EnableEurekaServer to the application class

本文建立注册服务器(注册服务器ralab-server),引入eureka-server依赖,pom.xml文件如下:

1
2
3
4
5
6
7
8
9
10
11
12
13
14
15
16
17
18
19
20
21
22
23
24
25
26
27
28
29
30
31
32
33
34
35
36
37
38
39
40
41
42
43
44
45
46
47
48
49
50
51
52
53
54
55
56
<?xml version="1.0" encoding="UTF-8"?>
<project xmlns="http://maven.apache.org/POM/4.0.0" xmlns:xsi="http://www.w3.org/2001/XMLSchema-instance"
xsi:schemaLocation="http://maven.apache.org/POM/4.0.0 https://maven.apache.org/xsd/maven-4.0.0.xsd">
<modelVersion>4.0.0</modelVersion>
<parent>
<groupId>org.springframework.boot</groupId>
<artifactId>spring-boot-starter-parent</artifactId>
<version>2.1.8.RELEASE</version>
<relativePath/> <!-- lookup parent from repository -->
</parent>
<groupId>com.ralab</groupId>
<artifactId>ralab-server</artifactId>
<version>0.0.1-SNAPSHOT</version>
<name>ralab-server</name>
<description>Demo project for Spring Boot</description>

<properties>
<java.version>1.8</java.version>
<spring-cloud.version>Greenwich.SR2</spring-cloud.version>
</properties>

<dependencies>
<dependency>
<groupId>org.springframework.cloud</groupId>
<artifactId>spring-cloud-starter-netflix-eureka-server</artifactId>
</dependency>

<dependency>
<groupId>org.springframework.boot</groupId>
<artifactId>spring-boot-starter-test</artifactId>
<scope>test</scope>
</dependency>
</dependencies>

<dependencyManagement>
<dependencies>
<dependency>
<groupId>org.springframework.cloud</groupId>
<artifactId>spring-cloud-dependencies</artifactId>
<version>${spring-cloud.version}</version>
<type>pom</type>
<scope>import</scope>
</dependency>
</dependencies>
</dependencyManagement>

<build>
<plugins>
<plugin>
<groupId>org.springframework.boot</groupId>
<artifactId>spring-boot-maven-plugin</artifactId>
</plugin>
</plugins>
</build>

</project>

RalabServerApplication文件

1
2
3
4
5
6
7
8
9
10
11
12
13
14
15
package com.ralab.ralabserver;

import org.springframework.boot.SpringApplication;
import org.springframework.boot.autoconfigure.SpringBootApplication;
import org.springframework.cloud.netflix.eureka.server.EnableEurekaServer;

@SpringBootApplication
@EnableEurekaServer
public class RalabServerApplication {

public static void main(String[] args) {
SpringApplication.run(RalabServerApplication.class, args);
}

}

运行RalabServerApplication

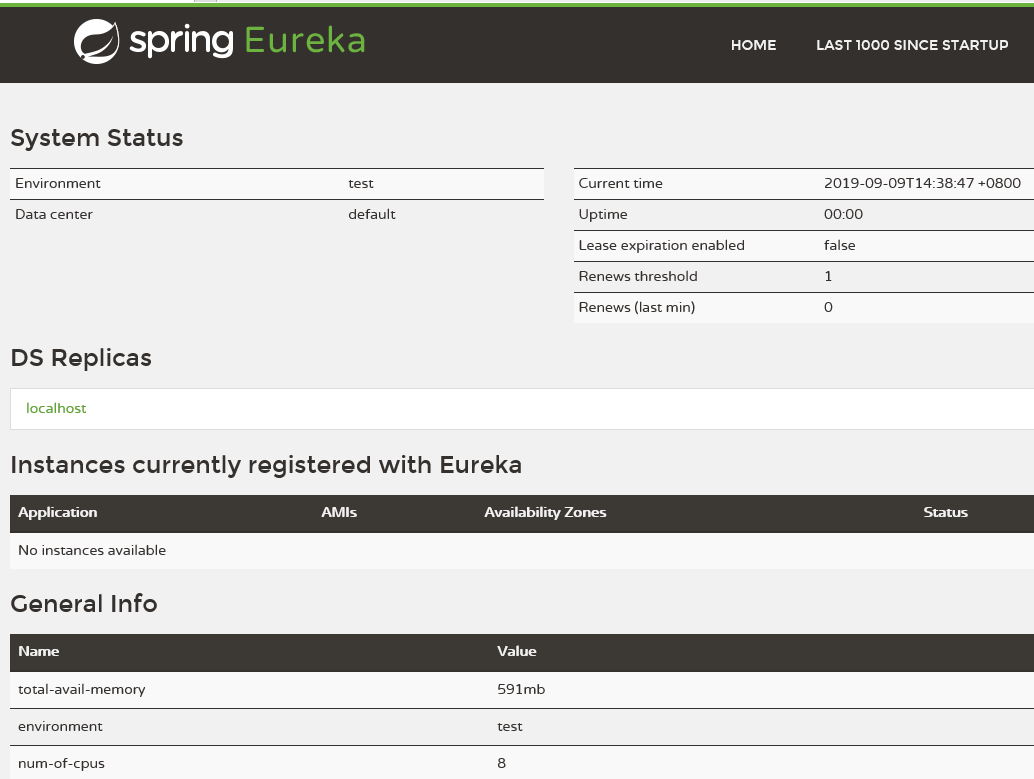
打开浏览器http://localhost:8761/

这时没有发现注册实例

上文采用spring boot建立了restful项目,本文建立新的项目,并处理与之通信
先设置上文应用程序的端口,resources文件夹application.properties
server.port=8090

微服务’ralab-client’

  • New mocroservice ‘ralab-client’ and add the Maven spring-boot-starter-web denpendency
  • Add server.port parameter to the application.properties file
  • Add RestTemplate instance to Communicate with mocroservice ‘ralab-nlp’ by url

新建maven项目(服务消费者ralab-client),引入spring-web依赖,pom.xml文件如下:

1
2
3
4
5
6
7
8
9
10
11
12
13
14
15
16
17
18
19
20
21
22
23
24
25
26
27
28
29
30
31
32
33
34
35
36
37
38
39
40
41
42
43
<?xml version="1.0" encoding="UTF-8"?>
<project xmlns="http://maven.apache.org/POM/4.0.0" xmlns:xsi="http://www.w3.org/2001/XMLSchema-instance"
xsi:schemaLocation="http://maven.apache.org/POM/4.0.0 https://maven.apache.org/xsd/maven-4.0.0.xsd">
<modelVersion>4.0.0</modelVersion>
<parent>
<groupId>org.springframework.boot</groupId>
<artifactId>spring-boot-starter-parent</artifactId>
<version>2.1.8.RELEASE</version>
<relativePath/> <!-- lookup parent from repository -->
</parent>
<groupId>com.ralab</groupId>
<artifactId>ralab-client</artifactId>
<version>0.0.1-SNAPSHOT</version>
<name>ralab-client</name>
<description>Demo project for Spring Boot</description>

<properties>
<java.version>1.8</java.version>
</properties>

<dependencies>
<dependency>
<groupId>org.springframework.boot</groupId>
<artifactId>spring-boot-starter-web</artifactId>
</dependency>

<dependency>
<groupId>org.springframework.boot</groupId>
<artifactId>spring-boot-starter-test</artifactId>
<scope>test</scope>
</dependency>
</dependencies>

<build>
<plugins>
<plugin>
<groupId>org.springframework.boot</groupId>
<artifactId>spring-boot-maven-plugin</artifactId>
</plugin>
</plugins>
</build>

</project>

RalabClientApplication文件

1
2
3
4
5
6
7
8
9
10
11
12
13
14
15
16
17
18
19
20
21
package com.ralab.ralabclient;

import org.springframework.boot.SpringApplication;
import org.springframework.boot.autoconfigure.SpringBootApplication;
import org.springframework.context.annotation.Bean;
import org.springframework.web.client.RestTemplate;

@SpringBootApplication
public class RalabClientApplication {

@Bean
public RestTemplate getRestTemplate()
{
return new RestTemplate();
}

public static void main(String[] args) {
SpringApplication.run(RalabClientApplication.class, args);
}

}

新建NlpResource

1
2
3
4
5
6
7
8
9
10
11
12
13
14
15
16
17
18
19
20
21
22
package com.ralab.ralabclient.resources;

import org.springframework.beans.factory.annotation.Autowired;
import org.springframework.web.bind.annotation.GetMapping;
import org.springframework.web.bind.annotation.RequestMapping;
import org.springframework.web.bind.annotation.RestController;
import org.springframework.web.client.RestTemplate;

@RestController
@RequestMapping("/nlp")
public class NlpResource {

@Autowired
private RestTemplate restTemplate;

@GetMapping("/service")
public String index()
{
String result = restTemplate.getForObject("http://localhost:8090/nlp/api", String.class);
return result;
}
}

设置端口
resources文件夹application.properties
server.port=8091

运行RalabClientApplication

测试http://localhost:8091/nlp/service

微服务’ralab-nlp’

  • New mocroservice ‘ralab-nlp’ and add the Maven spring-boot-starter-web denpendency
  • Add @SpringBootApplication to the application class
  • Add HelloController

本文采用maven建立应用程序(服务提供者ralab-nlp),引入spring-web依赖,pom.xml配置如下

1
2
3
4
5
6
7
8
9
10
11
12
13
14
15
16
17
18
19
20
21
22
23
24
25
26
27
28
29
30
31
32
33
34
35
36
37
38
39
40
41
42
43
<?xml version="1.0" encoding="UTF-8"?>
<project xmlns="http://maven.apache.org/POM/4.0.0" xmlns:xsi="http://www.w3.org/2001/XMLSchema-instance"
xsi:schemaLocation="http://maven.apache.org/POM/4.0.0 https://maven.apache.org/xsd/maven-4.0.0.xsd">
<modelVersion>4.0.0</modelVersion>
<parent>
<groupId>org.springframework.boot</groupId>
<artifactId>spring-boot-starter-parent</artifactId>
<version>2.1.8.RELEASE</version>
<relativePath/> <!-- lookup parent from repository -->
</parent>
<groupId>com.ralab</groupId>
<artifactId>ralab-nlp</artifactId>
<version>0.0.1-SNAPSHOT</version>
<name>ralab-nlp</name>
<description>Demo project for Spring Boot</description>

<properties>
<java.version>1.8</java.version>
</properties>

<dependencies>
<dependency>
<groupId>org.springframework.boot</groupId>
<artifactId>spring-boot-starter-web</artifactId>
</dependency>

<dependency>
<groupId>org.springframework.boot</groupId>
<artifactId>spring-boot-starter-test</artifactId>
<scope>test</scope>
</dependency>
</dependencies>

<build>
<plugins>
<plugin>
<groupId>org.springframework.boot</groupId>
<artifactId>spring-boot-maven-plugin</artifactId>
</plugin>
</plugins>
</build>

</project>

自动生成RalabNlpApplication.java代码

1
2
3
4
5
6
7
8
9
10
11
12
13
14
15
16
package com.ralab.ralabnlp;

import org.springframework.boot.SpringApplication;
import org.springframework.boot.autoconfigure.SpringBootApplication;
import org.springframework.context.annotation.ComponentScan;

//(scanBasePackages = { "com.ralab.nlp.controller"})
@SpringBootApplication
@ComponentScan({"com.ralab.nlp.controller"})
public class RalabNlpApplication {

public static void main(String[] args) {
SpringApplication.run(RalabNlpApplication.class, args);
}

}

新建HelloController.java

1
2
3
4
5
6
7
8
9
10
11
12
13
14
15
16
17
18
package com.ralab.nlp.controller;


//import org.springframework.web.bind.annotation.RequestMapping;

import org.springframework.web.bind.annotation.GetMapping;
import org.springframework.web.bind.annotation.RequestMapping;
import org.springframework.web.bind.annotation.RestController;

@RestController
@RequestMapping("/nlp")
public class HelloController {

@GetMapping("/api")
public String index() {
return "Greetings from Spring Boot!";
}
}

运行RalabNlpApplication

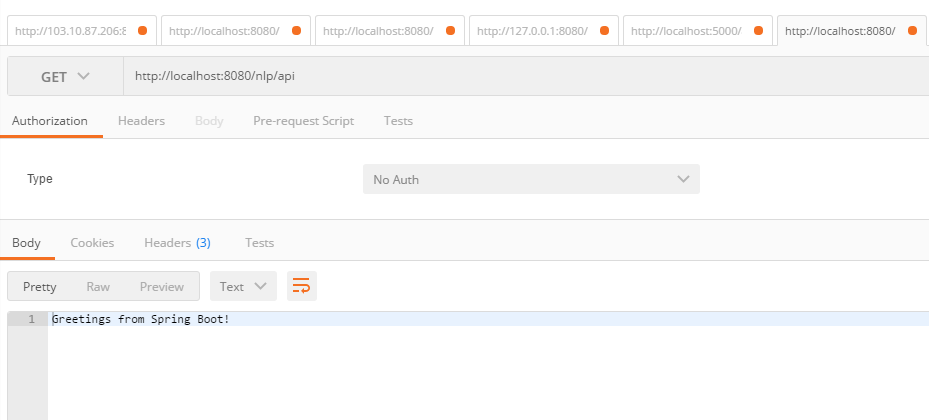
测试http://localhost:8080/nlp/api

1
2
3
4
5
6
import pandas as pd
import matplotlib.pyplot as plt

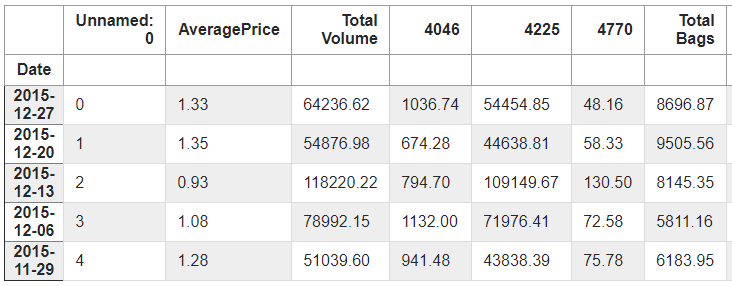
df = pd.read_csv('datasets/avocado.csv')

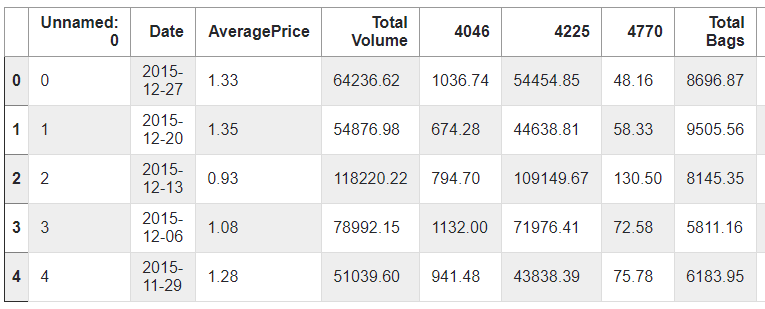
df.head()

1
df.tail()

1
df['AveragePrice'].head()
0    1.33
1    1.35
2    0.93
3    1.08
4    1.28
Name: AveragePrice, dtype: float64
1
df.AveragePrice.head()
0    1.33
1    1.35
2    0.93
3    1.08
4    1.28
Name: AveragePrice, dtype: float64
1
2
albany_df = df[df['region'] == 'Albany']
albany_df.head()

1
albany_df.index
Int64Index([    0,     1,     2,     3,     4,     5,     6,     7,     8,
                9,
            ...
            17603, 17604, 17605, 17606, 17607, 17608, 17609, 17610, 17611,
            17612],
           dtype='int64', length=338)
1
2
albany_df = albany_df.set_index('Date')
albany_df.head()

1
albany_df.index
Index(['2015-12-27', '2015-12-20', '2015-12-13', '2015-12-06', '2015-11-29',
       '2015-11-22', '2015-11-15', '2015-11-08', '2015-11-01', '2015-10-25',
       ...
       '2018-03-11', '2018-03-04', '2018-02-25', '2018-02-18', '2018-02-11',
       '2018-02-04', '2018-01-28', '2018-01-21', '2018-01-14', '2018-01-07'],
      dtype='object', name='Date', length=338)
1
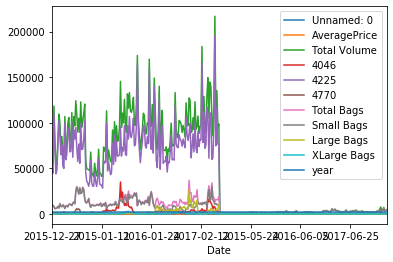
albany_df.plot()
<matplotlib.axes._subplots.AxesSubplot at 0x15c18c71e88>

1
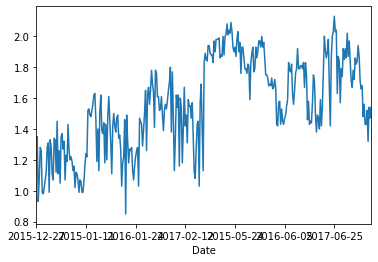
albany_df['AveragePrice'].plot()
<matplotlib.axes._subplots.AxesSubplot at 0x15c18ad00c8>

本文加载摄像头,显示视频,并写入文件

1
2
3
4
5
6
7
8
9
10
11
12
13
14
15
16
17
18
import numpy as np
import cv2

cap = cv2.VideoCapture(0)
fourcc = cv2.VideoWriter_fourcc(*'XVID')
out = cv2.VideoWriter('output.avi',fourcc, 20.0, (640,480))

while(True):
ret, frame = cap.read()
gray = cv2.cvtColor(frame, cv2.COLOR_BGR2GRAY)
out.write(frame)
cv2.imshow('frame',gray)
if cv2.waitKey(1) & 0xFF == ord('q'):
break

cap.release()
out.release()
cv2.destroyAllWindows()

上文已经安装了opencv的开发环境

这里测试图像显示及写入

1
2
3
4
5
6
7
8
9
10
11
# 导入cv模块
import cv2 as cv
# 读取图像,支持 bmp、jpg、png、tiff 等常用格式
img = cv.imread("data/lena.jpg", cv.IMREAD_COLOR)
# 创建窗口并显示图像
cv.imshow("Image", img)
cv.waitKey(0)
# 释放窗口
cv.destroyAllWindows()

cv.imwrite('lena2.jpg', img)